power grid failure

How To Effectively Prepare Your Family For Power Grid Failure

power grid failure

Imagine yourself and your family, forced from your home in the dead of winter, with nothing more than the few supplies you were able to carry amongst yourselves. Then imagine being shuttered into a community center with thousands of other families, displaced from their homes as well, relying on what few supplies the government could provide.

If you live a comfortable middle-class lifestyle in a first world country, this situation sounds preposterous, doesn’t it? It is not. Families, just like yours, faced this exact plight on December 20, 2013, when a massive ice storm hit parts of central Canada and the U.S., crippling many cities and leaving tens of thousands without power for days, sometimes weeks. Those who were prepared for such an event, having items such as blankets and medications to bring with them, fared much better than their ill-prepared counterparts.

In today’s modern society, we’ve come to rely almost implicitly on having a dependable source of power. When power fails, it causes utter and complete chaos for those not fortunate enough to have had the foresight to prepare.

What Is Power Grid Failure and Why Should I Care?

Of all the threats your disaster plan should consider, power grid failure is one of the more realistic and among the most likely to occur.  When a power grid fails, a substantial geographic area can be without power for hours, days, or sometimes even weeks.

In addition to the 2013 ice storm that decimated power sources to many areas of central Canada and the U.S., there have been several other power grid failures in the last decade that brought panic and chaos to areas all over the world:

  • In 2007, Indonesia suffered major grid failure due to a drop in demand that affected nearly 100 million people for over 7 hours
  • India faces ongoing grid issues due to sporadic increases in demand
  • In 2003, the Northeast Blackout at Con Edison left 55 million people in Canada and the U.S. without power; in some cases, this lasted for more than 2 days
  • In 2005, Louisiana and surrounding areas dealt with the aftermath of Hurricane Katrina that left 2.6 million people without power; some for extended periods of time due to the extensive flooding that structurally damaged buildings and blocked access to power sources
power grid failure
A view of the 2003 Blackout in the Northeast

What Causes Power Grid Failure?

The two most common causes of power grid failure are system failure and equipment failure, but other events can also wreak havoc.

System Failure

The power grid system may fail due to a disruption of equilibrium in power supplied and power drawn, triggering the line to trip and cutting off the supply of power. System failure was the culprit in Indonesia’s outage as well as in the frequent outages suffered by India.

A system failure can occur at the supply-end during extreme weather changes, such as a heat wave that causes an increase in the power drawn from the system to power cooling devices, or at the supplier-end if an error occurs in regulating the power input.

Equipment Failure

An equipment failure can occur at the station, transmission line, or transformer level. Any number of factors can be the cause of an equipment failure, such as an error in the digital processing system or physical damage due to an accident, construction, or weather.

Both the 2003 Northeast Blackout and power outages during Hurricane Katrina were caused by equipment failures.

Other Causes

Power grid failure can also be the result of malicious or criminal behavior, such as cyber terrorist or infrastructure attacks against a nation or a nuclear electromagnetic pulse (NEMP) designed to disable electronic equipment. In the wake of 9/11, many feared the Northeast Blackout in 2003 was in fact a terrorist attack.

Power grids can also fail due to large-scale electromagnetic storms, an electromagnetic pulse (EMP), or a reversal in the Earth’s magnetic field – which can cause temporary disruptions or permanent damage to electronic devices.  Click HERE Now to see our article on preparing for an EMP.

While events such as these have the potential to completely shut down power systems for an indefinite amount of time, the likelihood of their occurrence – and the extent of ensuing damage – has been hotly debated.

power grid failure
Our grid is surprisingly fragile and the effects of a failure can be catastrophic

What Can I Expect During a Power Grid Failure?

The immediate aftermath of a power grid failure is the loss of power, which means modern day methods of communications, sanitation, lighting, cooking, refrigeration / preparation, and transportation will all be unavailable.

Within the first few days of a power outage, the disruption in supply of fuel for transportation will lead to shortages in other supplies such as food and medication. Many who wait several days before stockpiling will be greeted with empty and pillaged Supermarket shelves. Don’t rely on any emergency services – medical facilities, emergency responders, and public officials will more than likely be overwhelmed and unavailable.

If the outage continues for a week or more, civil unrest will begin to grow as food and other resources become scarce. People will no longer be able to run generators or vehicles as fuel supplies run out, and many will experience a disruption in their finances or incomes.

In the event a power outage stretches out into the long-term, such as several weeks or perhaps indefinitely, alternate means of power will need to be found along with long-term solutions to meet everyday needs.

What Will I Need to Prepare My Family?

The best thing you can have during a power grid failure is a positive attitude. Make sure to do whatever you can to encourage hopefulness and keep spirits high.

In addition to the right attitude, I recommend doing the following to properly prepare yourself and your family:

  • Create a storage space that can be easily accessed in the dark
  • Stockpile at least two-weeks worth of supplies
  • Design a plan for preparing food, sanitation, living / sleeping quarters, entertainment (especially for children), and rationing for fuel and power sources
  • Store jugs of water in the fridge now to be used during an outage to keep food from spoiling; however, once the water melts, it should be used for cleaning or flushing, not drinking
  • Store a flashlight or lantern by every bed

There are ten integral categories that should be part of every well thought out power grid failure disaster plan:

  1. Drinking Water
  2. Food
  3. Lighting
  4. Heating
  5. Communication
  6. Sanitation
  7. First Aid
  8. Protection
  9. Additional Items
  10. Backup Power Systems

The following is a detailed discussion of the key knowledge and items to have as part of your disaster plan to ensure all the above categories are accounted for.

Drinking Water

For drinking water, the general rule is that you should have 1-2 gallons per day available for each member of your household. A two-week supply of water for a family of four would mean having 56-112 gallons on hand. If you have pets, consider their needs as well; a rule of thumb is 1 ounce of water per pound of pet per day, so a 20 lbs dog would need 20 ounces a day.

You can further ensure access to clean drinking water by having a water filtration method available such as the LifeStraw Personal Water Filter or water purification packets. This will allow you to draw on water from unclean sources.

Food

When stockpiling food for your family, you’ll want to plan for three meals per day, plus some snack foods for each member of your household. Don’t forget pets – include a two-week supply of food for them as well.

Choose food items that require little to no heating and that your family is familiar with. Consider that cooking requires substantially more fuel than heating; therefore, canned foods that need only be heated are favorable to dried foods that will require boiling. Oversize cans are great if you feel your family can consume all the contents in one sitting, otherwise the leftovers will spoil in the absence of refrigeration.

A convenient option for long-term food storage is to store some MREs (Meals Ready-to-Eat) which are designed for the military use but are a popular choice for stockpiling.

You can check out our Food Storage Guide here to help you decide what the best way is for YOUR family to keep your food supply.

Other key considerations when planning your food stockpile are as follows:

  • Gas supply lines may also be affected by an outage so ensure you have an alternative means for cooking and boiling water, e.g. a camp stove, fire pit, or gas or charcoal grill
  • For any of the above, be sure to have a two-week supply of fuel on hand such as firewood, propane, or charcoal
  • Be sure to store at least two manual can openers with your food supply

power grid failure

Lighting

In a power outage, electrical lighting sources will be unavailable so be sure to have a stash of lighting sources that can run independently of electricity, e.g. flashlights, candles and headlamps, as well as the means to power or light those items such as batteries, matches and lighters.

We recommend getting a couple of Vizeri LED flashlights and/or GRDE LED Headlamps.

You should also have a lantern that is bright enough to light an entire room. Whether you choose one powered by batteries, propane, or a hand crank depends on your own personal preference.

To conserve as much power as possible, consider storing a solar battery charger set (like this solar charger here) along with multiple batteries of different sizes to accommodate all of your emergency gear. Solar garden lights and glow sticks can also be used to light up hallways and other frequently traveled areas without draining your battery power.

Heating

In the case of a power outage in cold climates, conserving and maintaining heat will be key to survival. Should you find yourself in this situation, gather everyone in your household into one room and lay a towel along the bottom of the door to seal it. Do the same for any windows to limit the possibility of drafts. By lighting several candles and relying on residual and body heat, you can expect to keep the temperature comfortable for at least 48 hours. After that, you will need an alternative source of heat until the power is restored.

A fireplace or wood stove can serve as an excellent alternative source for heating. Should you have access to either, ensure your stockpiles include plenty of fuel to keep your fireplace or stove burning.  If this is how you will be warming your family, building an upside-down fire is a good way to have a long burning, self feeding fire. Learn how to make an upside-down fire here.

Another option is a portable propane space heater; however, this carries the risk of carbon monoxide poisoning without proper ventilation. No matter what heating source you choose, ensure you have a fire extinguisher available and ready should you need it.

An option for overnight heating that doesn’t involve the risk of flames or noxious fumes is to heat rocks on a fire then transfer them to a Dutch oven or other heat-safe cookware. The heat emitted from the rocks should be enough to provide heat throughout the night without compromising your safety.

In terms of gear, you will want to have blankets and low-temperature rated sleeping bags stored in an easily accessible location, so as to ensure quick retrieval even in the dark. You will also want to ensure each member of your household has enough clothing to cover them from head to toe, and enough layers so that they can add or remove clothing to regulate their temperature.

Communication

Having a hand crank radio (I recommend the Eton FRX2 Hand Crank Radio – see it here) can be invaluable in a power outage. In addition to providing important communications from the outside world, it can also be used to charge other electronic devices, such as cell phones. Keep in mind that cell phones and landlines cannot be depended on to work during power outages. It is always best to have backup methods of communication ready.

bug in plan
The Eton FRX2 is a great emergency radio that also has a flashlight and USB charging capabilities

Sanitation

Having proper sanitation protocols in place can not only help with hygiene, but also boost morale.

Here are some helpful hints for ensuring you and your family can cope with sanitation issues during a prolonged power outage:

  • Store plenty of disposable tableware to cut down on washing needs
  • Stock plenty of antibacterial wipes and hand sanitizer, as these can be used without water
  • Immediately after the power goes out, fill your bathtub and, if you have one, your washing machine with water to use for flushing and washing; if you don’t have a bathtub, fill as many buckets as you can from the shower or sink
  • Find out ahead of time whether or not your toilet will flush without power – this can prevent sewage backup in your home
  • If manually flushing your toilet by pouring water into the tank is not an option, make sure to add heavy duty contractor bags and kitty litter to your stockpile – these can be used to craft a toilet by lining a bucket with the contractor bags and adding kitty litter
    • You can also purchase a toilet seat to attach to the top of the bucket (like this one here), which can be especially helpful with children who may be apprehensive about using it
    • When the bag is full, or before it becomes too heavy to lift, tie it off and store it outside
  • Keep a supply of baby wipes on hand to use in place of bathing, this will help conserve water
  • In the case of a long-term outage, you will need a means of doing laundry; consider purchasing a hand-operated mobile washer with two buckets – one for washing and one for rinsing
    • Don’t wait until you are down to your last set of clean clothes before doing laundry – remember, there are no dryers and air drying can sometimes take all night

First Aid

In the case of a power outage, you will most likely be bugging-in and therefore have access to your household first aid supplies. However, it is still prudent to have a separate store of essential items such as bandages, antibiotic ointments, tools, any over-the-counter medications your family uses, and antidiarrheal medication to help your family cope with the change in sanitary and dietary conditions.

Check out our guide for building your own First Aid Kit HERE, along with a FREE Checklist!

It is also important to remember that emergencies services will most likely be overloaded and response times could be slow or the services unavailable completely. Include a copy of The American Red Cross First Aid & Safety Handbook to help you independently deal with medical emergencies.

Protection

As a power outage drags on, people will become increasingly desperate and the need to protect yourself and your family from those who aren’t so well prepared may arise. While firearms are always a popular choice, there are other options as well. Consider reinforcing the entranceways to your home and stocking weapons such as pepper spray.

Additional Items

Any additional items you pack need to be based on your family’s particular needs. Every household is unique, so make sure to pack items because they are essential to your family, not because your neighbor is storing them or you read it was a good idea on a blog.

Typical items to include would be:

  • Prescription medications
  • Toiletries
  • Pet care
  • Diapers
  • Feminine hygiene products
  • And anything else you wouldn’t want to be without for two weeks or more.

If you have children, ensuring entertainment options are available is critical. Make sure to have items such as games, books, cards and crafts readily available. Adding some special, non-perishable treats to your food storage can also serve as a morale booster.

Backup Power Systems

Depending on your budget and location, having a backup power system for your home can be an excellent way to prepare for power grid failure.

A generator will keep the lights on until power is restored

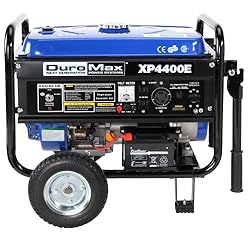
The most popular choice as a backup power source for emergencies are gas-powered generators. The DuroMax XP4400E is an excellent choice for a gas-powered generator for your home. If you choose to get a generator, make sure it’s installed correctly and that you test it out to ensure you’re familiar with how it works.

Solar panels are a great option for homes with adequate sun exposure and can be used year-round to save on energy bills; however, they are expensive to purchase and install. Off-grid solar panel systems will continue to produce energy in the event of power grid failure. However, a solar panel system that is connected to the grid will also go down in the event of a blackout, therefore installing a backup battery for your grid-connected solar panels could be an option.

You may also want to consider the following, less expensive alternatives:

  • A bicycle generator can be used to power small devices and appliances; some kits even include 12V battery charging attachments for creating stored power.
  • A solar battery charger can provide power indefinitely for cell phones and battery-operated devices.
  • A portable gas-fueled generator, such as the WEN 56200i, that is less powerful but can still come in handy for charging cell phones or running a small space heater.
power grid failure
The blackout in NYC after Hurricane Sandy

Conclusion

As our reliance on electrical devices and appliances grows, the need to have a solid plan prepared in case of power grid failure becomes ever more pressing. As the ice storm of 2013 demonstrated, going without power for even several days can have devastating effects.

While power grid failure may be one of the more likely disaster scenarios, it is by no means any less calamitous than other scenarios. Use the advice and tips provided in this article to ensure you and your family will stand a fighting chance should you be faced with having to survive without power for a prolonged period of time.

Above all else, remember to maintain a positive attitude and that chance favors the well-prepared!

Further Reading

Your Thoughts?

What do you do to prepare your family for a power grid failure?  What do you see as the biggest challenge to getting prepared? Let us know in the Comments Section below, thanks!

Read More

get home bag list

Get Home Bag List – How To Make The Best Kit For YOUR Needs

get home bag list

Jackson maneuvered his way swiftly through the crowded sidewalk, running as fast as he could, his briefcase in one hand and his get home bag in the other – the two things he never left home without.

Realizing there was no way he could make his train at this point, he slowed his pace and fell in line with the window shoppers and couples out for a stroll. He was five minutes from the station and the next train wouldn’t be arriving for forty-five minutes, he might as well enjoy the walk.

Suddenly, he realized that the entire street was moving against him, and swiftly. The road looked like a parking lot and people were rapidly abandoning their vehicles to flee on foot. For the first time, he noticed the thick stench of smoke in the air – not from cigarettes, but from something burning.

Instinctively he reached out and grabbed a young man running past him.

“What the hell is going on here?”

“You don’t know?” The young man replied incredulously. “There was an explosion. The whole damn train station is up in smoke!”

The young man wriggled free of Jackson’s grasp and took off running. But Jackson didn’t follow him. He didn’t need to blindly follow the panicked crowd that was descending quickly into pandemonium and chaos. He had been planning for just such an event and he knew exactly how to get home – that’s why he always carried his get home bag.

What Is A Get Home Bag?

Jackson and his wife Rachel are serious survivalists. They have a basement packed with enough food and water to last six months, each has their own bug-out-bag, and even their eleven-year-old son Derek knows what to do in an emergency. However, neither of them had considered packing a get home bag until a random car accident left Rachel and Derek stranded on a deserted road for several hours with no supplies and no way home.

get home bag list
You just never know what you may need to do to get home safely


To be fully prepared in any emergency, there are three types of bags you should have ready – an every day carry kit, a get home bag, and a bug-out-bag:

  • The every day carry kit contains items you would use with relative frequency, sometimes on a daily basis. Your every day carry kit helps solve frequent problems that come up in everyday life, as well as likely emergency situations.
  • A get home bag has the sole purpose of getting you home as quickly and as safely as possible in the event your normal commute is compromised (this can be due to anything from large scale emergencies such as natural disasters or civil unrest to minor inconveniences such as road closures or a vehicle breakdown). It typically contains specific items needed for 24-48 hours of survival and is compact enough to carry with you at all times.
  • A bug-out-bag equips you for survival in the event you will need to survive for several days or more. It is compact enough to carry, but not kept on your person at all times. Bug-out-bags are usually stored in an easy to reach yet concealed area of your house.

Building Your Get Home Bag List

The contents of your get home bag will vary greatly depending on where you live and the type of emergencies you need to be prepared for. You’ll also need to thoroughly examine your commute and improvise ways of getting home should your car or other types of transit be unavailable. If possible, use a map to get a bird’s eye view and consider the following when making your plan:

  • Will you be traveling through wilderness, suburbs, or major cities
  • Are there any major waterways you will need to cross or devise routes around
  • How many hours will it take you to walk to your house (on rugged terrain, the average fit adult can walk approximately 10-18 miles per day)

For Jackson, who works at a bank in a major city about 25 miles from his home, comfortable clothes and footwear were a must for his get home bag. He also made sure to pack inhalation and eye protection, as these can help in the event of urban emergencies such as explosions or pandemics.

Organizing Your Get Home Bag Contents

Typically, you’ll want to organize your get home bag essentials into three compartments, or levels. Each level contains the items needed to survive for a certain amount of time, with those needed right away on top on those needed for longer-term survival on the bottom. Generally, a get home bag is organized as follows:

Level 1 Items (up to 3 hours from home by foot)

Your first and most accessible level should include items such as:

Item TypeWhy You Need It
Folding knife
A folding knife is one of the most basic and versatile tools you can have. The CRKT M16 is lightweight, reliable and its 3" blade is legal to carry in most jurisdictions.
Bandana and / or dust mask
N95 dust mask stays in place while protecting from inhalation of harmful vapors and particles.
Boots
Boots should be waterproof, lightweight, durable, and suited for long treks over variable terrain. The Salomon Men's Quest 4D GTX Backpacking Boot also features a locking lace system for a precise fit that holds even if the laces come untied.
Map & Compass
Built to U.S. military standards, this compass is durable and water proof, with a tritium illuminated display.
Duct tape
Repair clothing or shelter, bandage injuries, prevent blisters. Roll can be flattened to save space.
Emergency signal item (mirror, flare, etc.)
Retro-reflective single-handed aimer for accurate long-distance signaling.
Fire kit / lighter
Always carry more than one means of starting a fire. A durable wind- and waterproof lighter is a compact option.
First aid kit
Basic bandages and medications for minor injuries.
Flashlight or headlamp
A hands-free option. This one features dimmer, strobe signaling, and hinge locks for stand alone use.
Multitool
Cutting wood, slicing rope, building shelter, and self defense, and many other uses.
Paracord
Assists with shelter building, first aid, climbing/descending, securing items to outside of bag, and hanging supplies out of reach of wildlife.
Protein bars
Satisfying and portable. Provides sustained energy and vital nutrients.
Rain poncho
Protection from weather and can be used as shelter.
Safety rated sunglasses
Shatterproof UV protection keeps out sun and debris.
Stainless steel water bottle

Sturdy, can be fastened to belt or bag. Non-insulated stainless bottles can be used to boil water over a fire.
Bug Spray
Biting insects can be detrimental to health and morale. Bug repellant in stick form are portable and easy to apply on the move.
Tactical pen
Integrated survival whistle, glass breaker, and magnesium fire starter.
Waterproof Notepad
Useful for jotting down coordinates, mapping landmarks, or leaving a note on the windshield of an abandonned vehicle.
Work gloves
Provides essential protection. Should be adjusted seasonally in cold climates.
Sunblock
Prolonged exposure to sun can cause many problems. Protect yourself with some sunscreen, this ine is in stick form for easy carry and application.
Self Defense Item
Carry something you are comfortable with. Pepper spray is a good option for people who do not want to carry a firearm and/or have a smaller frame.
Hat
Keep the sun out of your eyes and off your head to reduce fatigue.
CashI suggest carrying $500 cash in small denominations as emergency money. You never know when you may need to pay your way around an obstacle.
Change of clothesThese should be rotated seasonally. Dry clothes will keep you warm and enable you to travel further in an unfavorable climate.

Level 2 Items (up to 12 hours from home on foot)

The middle level of your pack should include items you’ll need if you’re more than a few hours from home, such as:

Item TypeWhy You Need It
Emergency radio
National weather and alerts to stay informed and aid in strategic planning. Also provides emergency power for handheld devices.
Hygiene kit
Beneficial to morale and personal comfort, as well as overall health.
Water filter / purification tablets
Eliminate risk of contracting parasites or viruses when accessing local water supplies.
Extra socks
Prevent blisters/sores and keep feet dry and comfortable with a fresh change of socks. If you expect to have to walk for long distances it is worth investing in a pair or 2 of hiking socks.
Spare BatteriesThese are good for barter, in addition to keeping your gadgets powered.
Extra Layer Of Clothes to Keep warm and/or dryLayering is an essential skill for maintaining an optimal core temperature when hiking in any climate.

Level 3 Items (up to 48 hours from home on foot)

The third level should contain items needed for being on foot for more than a day, including:

Item TypeWhy You Need It
Fixed blade knife
Heavy duty for handling hard use, full tang with glass breaker in pommel, flat ground drop point edge for easy maintenance.
Emergency blanket / sleeping bag or Bivvy Sack
Overnight protection from cold temperatures, ultralight yet durable material, reflects 90% of body heat.
Advanced first aid kit
Wide assortment of gauze and bandages as well as a trauma pad, moleskin, cold pack, and basic instruments to handle any personal injury.
Collapsible Walking sticks (to help ease strain from knees)
Ease strain on knees for extended travel on foot. Folds to 12" and adjusts from 48" to 53" for comfort.
Additional protein / energy bars
Maintain energy with a variety of nutrition-rich bars.
Glowsticks (this will help avoid using up flashlight batteries while making camp)
Provides 12 hours of light without draining flashlight batteries, can be fastened to shelter or used to mark trail to avoid walking in circles.

What Type of Bag is Best for a Get Home Bag?

There are several types of packs you can use for your get home bag, each with their own benefits and drawbacks. Ultimately, the bag you select should be best suited for you and your particular situation.

The following are different bags that can be used as well as their advantages and drawbacks:

  • Backpack: A backpack is great for hands-free carrying and making space for additional items, it also makes running and climbing fairly easy. However, it is not particularly easy to access contents when on the move and is not as discreet as other options.  For more info on picking a backpack, check out our guide here.
  • Messenger Bag: A messenger bag is a great choice for easy access while on the move, has many pockets, and doesn’t look like a survival kit (discreet). However, it is harder to run with and becomes uncomfortable over long distances, as weight isn’t distributed evenly. It is also difficult to attach outside items (such as extra clothing).
  • Hydration Pack: A small, minimalist backpack, a hydration pack holds water and is excellent for walking long distances, as the shoulder and waist straps provide an even weight distribution. However, there is limited storage space.
  • Lumbar Pack: A lumbar pack is compact and easily accessible with external straps for carrying extra clothing. However, all the weight is on your hips and there is no extra room for additional items you may have with you.

If you’re looking for a reliable bag, the following are the ones we suggest looking at:

BagBag TypeCostFeatures
5.11 Rush 24 Back Pack
Backpack$$$$Extremely high quality construction and well thought out pocket design make this a flexible and practical bag for real-world use. Molle integration along with hydration bladder compatibility mean easy customization to suit your exact needs.
Maxpedition Falcon II Backpack$$$Tough ballistic nylon construction protects gear and stands up to any conditions. Compact size keeps shape even when full making it easy to stash at work. Removable waist and chest straps distribute weight evenly.
Explorer Tactical Assault Pack
Backpack$Sturdy option at an economical price. Plenty of MOLLE attachment points and straps to carry extra gear. Multiple compartments ideal for easily accessing Level 1 items. Padded straps provide comfort for prolonged wear.
ALPS OutdoorZ Little Bear Hunting Lumbar Pack Lumbar Pack$Compact with mulitple compartments. Removable straps offer improved weight distribution.
Mountainsmith Lumbar Backpack Lumbar Pack$$Reinforced with high tenacity nylon wide. 14L capacity and extra mesh pockets on the waistband provide sufficient storage space for its compact profile. Shoulder strap pad for messenger carry or separately purchase Mountainsmith Strapettes for additional carrying options.
High Sierra Diplomat Lumbar Pack Lumbar Pack$HEX_VENT mesh padded back panel wicks moisture. Multiple compartments and 2 external water bottle holders (BPA-free bottles included). Webbing and tuck-away mesh pouch for loading additional gear.
Rapid Dominance Classic Military Messenger Bag Messenger Bag$Cotton canvas with polyester lining. Large 16L capacity and 2 inch wide comfort strap to handle larger loads. Subtle appearance conceals its purpose.
UTG Urban Messenger Bag Messenger Bag$No top flap enables all compartments to be readily accessible while on the move. Specialized slots for holding tools. Detachable pistol holster with belt loop. Discreet for daily carry.
Maxpedition Last Resort Tactical Attache Messenger Bag$$$Heavy duty water resistant nylon exterior. Removable divider lends to customizing main compartment. Multiple hook and loop pockets for smaller gear.
Camelbak HAWG 100 oz Hydration Pack Hydration Pack$$$Sufficient gear storage capacity plus 3L hydration bladder. High density nylon harness with EVA foam shoulder padding. MOLLE attachments on front panel for additional gear.
CamelBak M.U.L.E. 100 oz Hydration Pack Hydration Pack$$$Separated compartments for Level organization. Compact size easy to manuever thrrough crowds. Multiple hydration tubing exit points. fleece-lined pouch ideal for safely storing eyewear.
Osprey Men's Manta 36 Hydration Pack Hydration Pack$$$Weather protected with integrated raincover. Over 30L capacity rivals a backpack and hipbelt provides support for heavier loads. Airspeed suspension and BioStretch harness team up for a comfortable and ventilated fit.

Storing Your Get Home Bag

The essence of a get home bag is to get you home when disaster strikes, which is why it’s imperative to keep your bag with you as much as possible. Jackson carried his get home bag to and from work with him and kept it in his office. When an unexpected explosion suddenly left him without a way home, he was ready.

Leaving your bag in the car while you are at work is unwise, especially if you park in a parking garage. In a disaster scenario, you cannot be guaranteed access to your vehicle and you need your survival supplies on hand. If you can’t keep your get home bag with you while you’re working, consider using a gym locker, P.O. box, or public locker to store it. Just ensure that wherever you pick is a location you can reach immediately should disaster strike.

But….

The exception here is if you happen to have a job where you are driving around the majority of the time to see clients for example or visit job sites.  In this case, you car is obviously a smart place to keep your get home bag essentials as you will be more likely to be near it than your office when an emergency occurs.

get home bag essentials
Make sure you get your GHB right. Don’t rely on cheap, premade junk kits.

Avoiding Common Mistakes For Get Home Bag Contents

Size: Always remember – a get home bag is not the same as a bug-out-bag; they do not serve the same purpose. If the size of your get home bag rivals your bug-out-bag, you’ve over-packed. Only include those items absolutely necessary to get you home quickly. To save space and better organize your bag, you can group like items in Ziploc bags and vacuum seal clothing. By packing your bag using the three-level method described in this article, you can ensure the items you’ll need right away are easily accessible. If you’re going to include a pair of boots, these can be carried alongside your get home bag rather than inside to save space.

Supplies: Similar to your bug out bag, perform seasonal reviews on your get home bag contents to ensure you have essential items and are not carrying around extra weight. For instance, don’t get caught without sunscreen in the summer or warm layers in the winter.

Location: Make sure you store your get home bag where it can be accessed quickly, keeping it near your person when at all possible.

Anticipating Threats / Scenarios: It is crucial that you plan ahead and know your surroundings and what type of terrain conditions you will be facing. An urban get home bag for example will have different essential contents that a rural one.  No matter how far the distance is you need to travel, never assume you can make it before nightfall and pack accordingly.

Conclusion

As you well know, disaster can strike at any place, any time. Amid the chaos of an unexpected event, preppers like Jackson can remain calm and use their carefully packed get home bags to ensure they reach their families as quickly and safely as possible. No matter how fool-proof your bug out plan is, you can’t execute if you can’t get home – that’s why having a get home bag accessible at all times is essential.

Your Thoughts?

Do you have an item that you think it ESSENTIAL for any get home bag?  Do you keep your get home kit in a bag or backpack that you want to recommend?  Let us know in the Comments Section below, thanks!

Read More

Food Storage Battle: Cans vs. Buckets

food storage plan

More than getting yourself safe, survival means being calamity-ready and making sure that you have stored ample amount of food and water. With a preparedness guide and proper food storage, you can have a lifetime supply of food.  Looking at your food storage options is especially important if:

Looking at your food storage options is especially important if:

  1. You are planning on bugging in or shelter in in place for any period of time
  2. You are planning on caching food and supplies along your bug out route
  3. You have a bug out location where you will be storing food for months or years
dry food storage
There are lots of food storage options, you don’t need to limit yourself to MRE’s. Photo by See-ming Lee via Flickr

Did you know that there are certain types of foods that can definitely last a lifetime? Knowing which foods to include in your food storage list is crucial to survival. Recently, there has been a heated debate over which between cans or food buckets are better to store. With various natural factors to consider such as moisture, sunlight, and even insect infestations, this list is geared toward helping you choose whether cans or food buckets work best for you.

Canned on Cans

Most preppers today think of canned goods as the only way to store food. Accordingly, it seems that canned foods have been an everyday necessity in every American household. Last 2011, a survey by the Canned Food Alliance revealed that 84% of Americans eat meals out of canned foods a couple of times in a month, with 34% having canned food meals thrice a week.

food storage checklist
There are both store bought and DIY options for your food preps. Photo by US Department of Agriculture via Flickr

Canned goods are safe alternatives to fresh or frozen foods while meeting the dietary needs of every consumer and avoiding preservatives. These offer a wider variety for storage purposes and are readily available since they can be purchased in any grocery store. As such, it is no wonder that most Americans living a busy day resolve to eating canned foods.

Bucket It All Up

Most prepper’s storage room is filled with a variety of foods other than canned goods. Since variety and quantity are crucial, preppers tend to go for buckets and pails as an investment for long term bulk food. Unlike canned foods, food buckets could hold rice, grains, beans, dehydrated vegetables, sugar, powdered milk, and even ready-made meals.

food storage buckets
Storing food in buckets has lots of flexibility. Photo via ClintJCL via Flickr

Since both canned goods and food buckets could give you the food you need for your survival, here’s a rundown on the pros and cons of canned foods and food buckets to keep your preparedness guide and food storage secured.

Pros and Cons Of Cans vs Buckets

Price

    • Canned goods are cheap and this is why most people consume these products.
    • Food buckets, since they come in larger sizes, are sold at a higher price. If you count the math, buckets are good for a number of servings, making it better at price. However, you may opt to make your own food bucket which costs less, as long as you take note of the proper food storage techniques and buckets allowed for long-term storage.

Shelf-life

    • Most of the canned goods have 3 years shelf-life. However, if exposed to water or a humid temperature, it is reduced to 2 years or less depending on the amount of rust. Rusting around the lid of the can is a sign that the canned good is not fit for eating anymore.
    • On the other hand, food buckets have as long as 15 years of shelf-life. It should be noted, however, for those making their own food buckets that recycling signs such as HDPE#2, LDPE#4, PP#5, or PETE#1 should be present for a bucket to be food grade.
food storage in plastic buckets
An advantage of buckets is that they can store more food in a single container. Photo by Tim Patterson via Flickr

Portability and Convenience

    • Canned goods give you the convenience of eating with just heating or eating it fresh from the can. Canned goods are perfect for on-the-go or carrying in your backpack since it comes in small sizes.
    • Food buckets have a wide variety, grains, beans, and the like. You could buy paint buckets or food storage buckets in your nearest local store and prepare these on your own. However, when it comes to portability, going for food buckets might be a nuisance since it is too heavy to bring around.

Nutrition Value

    • Though canned goods are often labeled as bad for the health compared to fresh produce, it’s really not that bad at all, especially when you are talking about food that lasts for a longer time. Accordingly, canned foods were processed within hours of their harvest to keep their freshness and nutritional value.
    • Food buckets are often dried or dehydrated. As such, it is free from preservatives and the drying or dehydration process keeps its original nutritional value.
food storage canning
Canning is a time-tested way to store excess harvest from your garden. Photo by Sharon Drummond via Flickr

Taste

    • Canned goods are mostly drenched in some liquid solution which overpowers the actual taste of the food.
    • Food buckets are able to retain the actual taste of the food, may it be sausage, rice, pasta or beans. Some food buckets available in the market today often come with recipes with all the ingredients included inside. This enables people to have a varied menu for the day.

Preparation

    • Canned goods do not require preparations as they are readily available in every market or grocery stores.
    • If you choose to make your own food buckets, then it requires time for preparation and the right storage, depending on the food to store. However, food buckets may also be bought in the market or online.

Final Thoughts On Food Storage Planning

Throughout history, people have come up with various ways of keeping and storing food as a crucial step towards being calamity-ready. Two of which, cans and food buckets have been popular today as it is able to store food at a longer length of time. Do take note that variety and balance in food storage is essential.

More than choosing between cans or food buckets, preppers should consume and replace these stored foods as well to keep them in the loop on how these are prepared and to keep their stock new. Assessing your readiness for the calamity right now will benefit you and your family, so check your preparedness guide and keep your food storage filled with cans, or buckets; it’s your choice.

Your Thoughts?

Do you have a favorite food storage method?  Is there anything that someone who is new to storing food should look out for?  Please let us know in the Comments Section below, thanks!

Read More

prepper

Top 10 Prepping New Year’s Resolutions

prepper

Happy New Year!  I hope you rang in 2015 in style.  With the new year starting people have been asking me what my new years resolutions are going to be.  Rather than giving the typical answer of going to the gym/being healthier/improving habits, etc. I started to think, “What could I resolve to do to increase my level of preparedness?”

New Years Resolutions For Preppers

It turns out there are LOTS of things I can do and I was wondering if anyone else was in a similar situation, trying to look at 2015 and see what their prepping related goals should be.  If you are one of these people, I have put together a list of my Top 10 Prepping Resolutions to help you along.  You can find them below and where I thought it would be useful, I have included a link to a related article to help you accomplish your goals:

1.  Make/Revise Your Bug Out Plan

Having a bug out plan laid out before a disaster strikes is the single most effective way of improving your chances of survival.  Otherwise you are just reacting randomly and following the herd.  Making a plan does not need to be complicated – I even created a FREE template for making your custom Bug Out Plan that you can download and fill out here.  You can make one in under an hour.  Once you have made your plan be sure to discuss it with whoever you plan on bugging out with and if feasible, practice executing it.

If you already have your bug out plan in place, firstly: AWESOME WORK!  Secondly, it is a smart idea to review it periodically and adjust it as your needs and potential threats change.  Pull it out and take a good look at it.  Do you need to make any adjustments?  Are you bugging out with different people now than when you made it?  You may not to make any changes at all but you won’t know until you give it a good review.

2. Take Your Bug Out Bag For A Test Run

If you have your bug out bag packed and ready to go, GREAT JOB!  You have taken the first steps towards being prepared.  It is wise to periodically take it out for a test hike to make sure it is still manageable.  You may need to carry it for DAYS on end, so if you aren’t able to comfortably carry it for a few hours, you may need to make some adjustments.

Learn this lesson now, before an emergency happens.  Take your bug out bag out for a hike over varying terrain to test its weight, fit, and balance as well as your own ability to carry it.  Make adjustments as needed, this may mean lightening the load or just shifting items around to improve how the bag sits.

You will be grateful you did this if you ever have to carry it for an extended period.  Check out this article here for tips on packing and loading your bug out bag for comfort and mobility.

3.  Assess Your Daily Needs & Make Your Every Day Carry (EDC) Kit

Having your bug out bag at home is great but what do you do to make sure you are ready to overcome life’s unexpected challenges when you are away from the house?  Having an Every Day Carry (EDC) kit on hand will make sure you are able to easily tackle both frequently occurring problems in your life as well as those outlying bigger challenges that may strike.

The first step is to assess your personal needs and likely threats.  Do you have a frequently occurring problem that would be made easier with a tool on hand?  Do you often have to deal with low light conditions or other environmental challenges?  Review your needs and see if there are any small, compact tools that you can put together into an EDC kit to keep in a pocket, purse, or backpack so they are always on hand.  Here is an article I wrote about assessing your challenges and making your first EDC kit, which should make this easy for you to accomplish in under an hour.

Many people look forward to the New Year for a new start on old habits.”

– Anonymous

4. Build A Badass Bug Out First Aid Kit

If you are ever in the unfortunate situation where you are forced to evacuate from an unsafe situation for an extended period, the question of someone in your party getting injured is more “when” than “if”.  Being prepared with both the first aid skills and proper supplies can make the difference between quickly patching them up and moving or bogging your team down for an unknown quantity of time.

When minutes are critical, getting slowed down by an injury can be deadly.  There are lots of ready made first aid kits out there, some good and some bad.  If you want to be sure that the kit you are packing in your bug out bag will meet your needs, it is best to pack it yourself.  In my article on making your bug out first aid kit (click here to read it), I recommend focusing on the most likely and impactful of injuries:

  1. Trauma Injuries – Those that frequently result in a large loss of blood and are far beyond simple scrapes and cuts.  These can be the result of a fall, car accident, or violence.
  2. Mobility Injuries – This can be considered anything that impairs your ability to move at your optimal speed.  It may be a sprained ankle, injured back, or twisted knee.

Prioritizing these types of injuries will maximize your chances of keeping your group moving to safety.  In the article (see it here) I also include a free downloadable checklist to use when stocking your first aid kit.

5.  Talk To Your Friends & Family About Getting Prepared Together

It is possible (and in some cases easier) to prepare on your own.  However, anyone who has done this for a while will also tell you that prepping alone can be a slog.  There is so much to think of and do.  This is compounded if you have taken on the responsibility of prepping for your entire family.

Take the opportunity to sit down with your family, friends, or whoever else there is that you plan on bugging out or bugging in with and have an informal chat about what you have been doing, what you want to accomplish in 2015 and how they can become involved to help themselves.

These conversations can be awkward and I am not going to lie, they will not always go the way we want.  However, opening up the dialogue can go a long way in getting the people around you to understand your perspective and at least gain an appreciation of WHY you choose to spend your free time looking to the future and setting down plans to make sure you are in a position to thrive.  With any luck, you will be able to recruit some helpers to make the work go faster!

6.  Master Your Basic Survival Skills

There is no better way to improve your chances of survival than by learning new skills and honing your existing ones.  There are the basic skills:

  1. Water
  2. Shelter
  3. Food
  4. Fire

These should be in the arsenal of EVERY prepper.  You can’t consider yourself prepared without knowing the basics of those 4 (our article here covers the fundamentals).

Bushcraft is an even more refined discipline of outdoor skills and advanced preppers also aim to master this skill set.  There are many elements of bushcraft that encompass the basic skills and take them to the next level, making the great outdoors itself a tool.  For more info about getting started in bushcraft click here.

“Character is the ability to carry out a good resolution long after the excitement of the moment has passed.”

– Cavett Robert

7.  Reduce Your Bug Out Bag’s Weight By 10%

When packing your BOB it is easy to get carried away packing everything including the kitchen sink.  There are just so many possible problems and a near infinite amount of gear to choose from.

Nearly all of us could be well served by taking periodic looks at our bug out bag and seeing what we can either do away with or combine into a multi-purpose tool to save weight and space.

10% is a good starting point but if you can reduce your bag’s weight by even more, you are on the right track.  For tips on adding multi-purpose tools to your bug out bag, check out this article here.

8.  Improve Your Physical Ability To Bug Out

Unless you are regularly running triathlons, this is an area where we can all use some improvement.  The better physical shape you are in, the easier an evacuation will be for you.  In addition, more fit people are able to provide more physical support to their bug out team or family.

If you haven’t exercised in a while, start off slowly to avoid injury.  Keep at it and work up to being able to carry your bug out bag over long distances.  Here is a helpful article from Backpacker.com about types of excercises to try out to improve your functional strength and endurance.

“Always bear in mind that your own resolution to succeed is more important than any other.”

– Abraham Lincoln

9.  Help 1 Person You Know Get More Prepared

You may know a friend, relative, or neighbor that wants to get prepared but just does not know how to get started.  Take them under your wing and help them get off the ground.  It may mean teaching them a basic skill, helping them get their bug out bag together, or having them over next time you are working on a prepper project.

Getting your community as a whole more prepared is a fantastic goal that will pay dividends the next time a disaster strikes, it may be the person who you helped get started that lends you a hand when you are in need.  If they are looking for a basic resource to learn about getting started prepping, you can point them to this article here.

10.  Take Action And Follow Through!

Even the best intentions are useless if you do not follow them up with actions.  If you make any of these resolutions or another one that you come up with, BE SURE TO FOLLOW THROUGH.  Preparedness is a long journey of constant improvement, no matter what you have done in the past, there are always more skills to learn and more tools to master.

I know that it can be easy to get excited at the beginning and then lose steam as life gets in the way – look at any gym on January 1 and then again in February.  To help you follow through with your prepping goals I want to offer my help.  If you want to commit to a preparedness related New Years resolution, email what your goal is to me at: info@thebugoutbagguide.com.

Do this and I will personally follow up with you to keep you on track.

That’s right, I will personally email you to help keep you focused and if need be, help overcome any stumbling blocks that hold you up along the way.  This is my personal New Year’s resolution, and I look forward to following it through!

happy-new-year

Your Thoughts?

Do you have a preparedness New Year’s resolution that you are willing to share?  Is there one that you have accomplished in the past that you want to inspire us with?  Please let us know in the Comments Section below, thanks!

Read More

bug out bag

Best Prepping Articles Of 2014 From Around The Web

bug out bag

It has been a busy year for the preparedness community with many worldwide and local events testing our resolve.  Looking back at 2014 we can remember the rise of Ebola and ISIS as well as the civil unrest around the Ferguson case.

It can be hard choosing what to prepare for and there are so many great resources out there to use to learn the skills you need to be truly ready.  I thought it would be useful to put the most popular preparedness related articles here in one place, not only for The Bug Out Bag Guide, but also from other sites around the web.  I reached out to over 100 preparedness bloggers to see what was their most widely shared article was of 2014.  I got back some interesting results and collected them here for your reference.

I hope you can look back on 2014 and see how your own level of preparedness has grown and look forward to continuing this development thru 2015 and beyond.  Remember as always, Chance Favors The Well Prepared.

The Most Shared Articles From The Bug Out Bag Guide In 2014

Article (Click To read it)What's It About?Facebook/Pinterest/Twitter Shares
5 Basic Survival Skills You Need When Bugging OutThe basics of water, shelter, fire, food, and keeping a positive mental attitude when bugging out.6,500+
Bug Out Vehicle ChecklistHow to choose a bug out vehicle and what to pack in your evacuation kit.3,200+
How To Choose The Best Survival Tomahawk For Your Bug Out BagA look at the most important features to have in a bug out tomahawk as well as weighing your options to pick the best one for your individual needs.2,000+
How To Build An Urban Survival KitA look at urban survival planning factors and what specific gear you need in your bug out bag to maximize your chances.1,400+
How To Make Your Family Bug Out BagWhat skills to teach and gear to pack based on the age of your children. Also how to adjust your plan to accommodate for the young ones' needs.1,300+

Most Shared Prepping Articles From Around The Web

In addition to our own articles I also reached out to other preparedness bloggers to see what were their own most shared posts of 2014.  It was interesting to see what other people are reading and sharing with their friends.  There was a wide range of topic that they sent back and they give me new ideas for where to expand my own preparedness skill set in 2015.

SiteTitle (Click To Read The Article)Total Shares
Mom With A Prep10 First Aid Skills Every Parent Should Know45710
Food Storage Moms15 Reasons Why I Store Epsom Salts18352
Food Storage And SurvivalFood Storage Shelf Life + Printable Chart!11817
Survival At HomeDollar Store Preps - Packing Your BOB On The Cheap!9235
Backdoor Survival60 Emergency Supplies You Can Buy for a Buck9000
Melissa K. Norris.com7 Depression Era Tips to Stretch Your Food Budget9000
The Daily PrepGuide To Long Term Food Storage8800
Gray Wolf Survival5 Discreet Weapons To Can Carry Almost Anywhere7300
GNOWFGLINSHow to Homestead Without 100 Acres and A Cow6500
Simply CanningCanning Venison Cubed and Raw Pack4000
Montana HomesteaderHow To Cook On An Open Fire3600
Mama KautzCooking Without Power1100
Preparedness MamaHow to Communicate With Family in an Emergency857
Lil Suburban HomesteadDehydrating Apples….A Delicious, Healthy, Portable Snack142
Homestead DreamerThe 5 Stages New Preppers Go Through135
Are We Crazy Or What?Food Storage Basics
Apartment PrepperBuild your Grab and Go Binder
Trayer WildernessWhat To Gather For Fire Making & How To Make A Fire
The 7 P's BlogCamp Fire vs. Survival Fire vs. Cooking Fire
Survival SherpaHow to Make Firebricks and Wood Stove Logs for Free!

What do you think?

Did you have a favorite prepping resource from 2014?  Did you learn anything this year that was really useful that you want to share?  Let us know in the Comments Section below, thanks!

Read More