avalanche safety

Avalanche Safety Skills And Gear For Surviving The Backcountry

avalanche safety

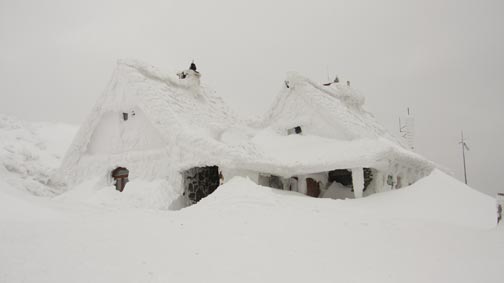
A big part of winter is the ability to enjoy winter sports and explore snowy, mountainous expanses. However, lurking behind the beautiful facade of freshly fallen snow is the deadly risk of getting caught in an avalanche. Anyone who participates in winter sports or mountain expeditions needs to have avalanche preparedness high on their threat assessment list. Even if you don’t engage in activities where the threat of avalanches is high, you never know when you may need avalanche safety skills – especially if your bug-out plan may take you through snowy, mountainous regions or if you live in the backcountry.

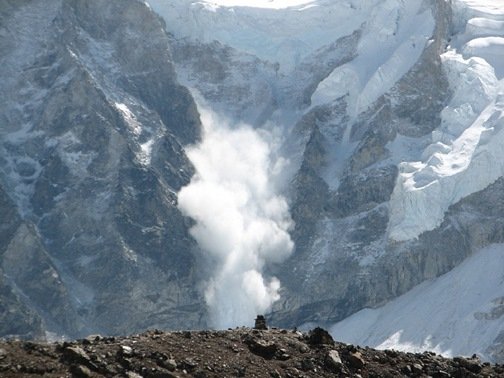
Avalanches are some of the most deadly obstacles nature can throw at you and when it comes to preparing for avalanches, prevention is your most important skill. Always ensure you know as much as possible about the area where you will be traveling, including daily conditions, avalanche warnings, avalanche-prone areas, local emergency telephone numbers, and how to identify and avoid high-risk situations.

While prevention is your best defense against avalanches, there are techniques you can use to help you survive should you become caught in an avalanche. In this article, we’re going to discuss what those techniques are as well as introduce important avalanche safety gear that you can use to increase your chances of surviving an avalanche.

Crucial Avalanche Safety Gear

ItemDetails
Backcountry Access Tracker2 Avalanche Beacon
• Digital triple antenna processor uses 3 AAA for 200 hours of transmit or 1 hour of search mode
• Detects and tracks multiple burials for group situations
• Lights indicate direction and display indicates distance in meters to quickly locate victims
• Includes harness
BLACK DIAMOND PIEPS DSP Sport Avalanche Beacon
• Digital triple antenna plus reference antenna with 50 meter search radius
• Mark function allows you to flag signals in multiple burials
• Single button design is easy to operate with gloves on
• Includes harness
Ortovox Zoom+ Avalanche Transceiver
• Digital triple antenna with motion sensor that switches back to transmit to protect rescuers in secondary avalanches
• Uses higher, faster beeps to indicate proximity to the victim so your eyes are free to scan the area
• Also displays distance and direction
Ortovox Avalanche Rescue Set-Zoom+
• Rescue set includes Ortovox Zoom+ transceiver, probe, and shovel
• 240 cm aluminum probe features Kevlar tension system and depth markings
• Shovel is reinforced for rigidity and high side walls provide 2.5 liter volume for efficient digging
AAA 4004 Red Aluminum Sport Utility Shovel
• Lightweight shovel weighs only 1.3 lbs and disassembles into 3 pieces for easy transport
• Telescoping handle adjusts between 25-32 inches for better leverage
• Sturdy aluminum scoop for handling heavy snow and ice
Black Diamond Transfer Shovel
• Hard anodized scoop has a sharp edge for cutting through packed snow and ice
• Removable handle extends for digging in deeper pits
• Compact trapezoidal design fits well in most backcountry packs
Backcountry Access Dozer Hoe Shovel
• Versatile design works as a shovel or converts to a hoe to adapt to the situation
• Large slip-proof grips on handle and blade improve grip even with gloves on
• T6 heat treatment prevents snow from building up on the inside of the shaft
Backcountry Access Stealth Avalanche Probe
• Rapid deployment action for when every second counts
• Collapses to a bundle about 18" long by 2" across to store easily in a backpack
• Laser etched depth markers indicate how deep to dig. Also helpful for reading snow pack layers
Black Diamond Quickdraw Probe Tour
• Aluminum shaft with alloy tip that is wider than the shaft for improved sensitivity
• High visibility markings for determining depth
• Includes rapid deployment stuff sack, which allows the probe to be removed and assembled in one step
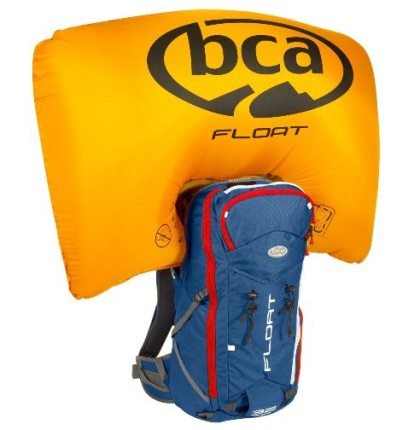
BCA Float Airbag
• Airbag trigger can be mounted on the left or right side for optimal access
• Pack features gear integration points for carrying snowboards, skis, radios, water bladder, ice axes and more
• Entire system weighs only 7.1 lbs, including the cylinder (sold separately)
Backcountry Access Float Refillable Cylinder - Empty
• Uses 2700 psi to rapidly inflate the float when triggered
• Can be refilled at a certified refill station after use
• Lightweight at 1.45 lbs and designed to work with the BCA Float Airbag
Ortovox Mens Avalanche Rider 24 ABS Backpack
• Designed to work with M.A.S.S. system, sold separately
• Removable SPS Pro2 back protector to help prevent spinal injuries
• Chest strap features a safety whistle to signal for help
Ortovox M.A.S.S. For Backpack
avalanche safety
• Modular Airbag Safety System (M.A.S.S.) includes dual airbags with independent air chambers for added safety
• Inserts into Ortovox Avalanche Rider backpack in just minutes
• Release grip can be configured on the right-or left-hand side, with the angle and height adjustable to the quickest access location for the wearer
POC Fornix Backcountry MIPS Ski Helmet, Uranium Black, Medium/Large
• Equipped with MIPS (Multidirectional Impact Protection System) for direct and oblique impacts
• Aramid fiber bridge disperses energy due to its high tensile strength
• Adjustable ventilation and straps for a snug and comfortable fit
Smith Vantage Unisex Adult Snow Helmet
• Koroyd lining absorbs 30 percent more energy than styrofoam, offering better protection in both low and high impact crashes
• Boa FS360 fit system uses a halo design for the perfect fit
• Extra thick Snapfit ear pads provide full protection of the ears
Click the images to view current prices on Amazon.


When equipping your crew with survival gear, remember that each and every member needs to be equipped with these items – a shovel will be of no use if it is buried with the victim and the same goes for probes. As for the avalanche beacon, each member of your crew needs to have one harnessed to their chest, not in a pocket or backpack as these items can easily become separated from the person in a violent tumble.

avalanche safety
Every member of your party needs to be equipped with avalanche safety gear and survival techniques before heading into the backcountry.

Avalanche Beacon: The One Piece Of Gear You Should Never Be Without

What it is: An avalanche beacon is a type of transceiver that can be used to locate its wearer in the event of an emergency.

How it works: The avalanche beacon sends out a radio signal, transmitting at 457 KHz (a universal and international radio frequency). Avalanche safety beacons are also able to switch to receive signals from other beacons – one of the many reasons why everyone in your party should be wearing one.

When a signal is received, the beacon will beep with increasing volume as it gets closer to the source of the signal. This allows you to pinpoint the location of someone buried beneath the snow.

avalanche safety
Diagram of how the Black Diamond PIEPS DSP Sport Avalanche Beacon detects and displays multiple burials. Click the image to learn more on Amazon.

There are two types of beacons: analog and digital. The analog systems use a single antenna and have a broad range, able to receive signals from further distances. A beep is typically used to indicate the location of a signal. The digital systems use multiple antennas and have a much narrower range of signal reception. Digital systems use both beeps and a visual display to accurately narrow in on a signal and some even have light signals to indicate direction and display the distance to the signal.

Before setting out on any excursion, your beacon should be fully charged, turned on, and set to transmit at 457 KHz. In times of emergency, it can be very difficult to move, much less access your device, if you are buried under snow – or worse, you may be unconscious.

Additionally, when you or someone in your crew becomes buried in an avalanche, the window of time you have to be found or to find someone else is very narrow – 15 minutes at most. Everyone in your crew should practice with their beacons ahead of time so that they are proficient in sending and receiving signals, as well as following signals to find the source.

avalanche safety
The lights indicate direction and the number tells the distance in meters to the transmitted signal from another avalanche beacon. Click the image to view the BCA Access Tracker2 on Amazon.

A harness is an extremely important piece of avalanche safety equipment that will keep your beacon close to your body and protected underneath your clothes. By having your beacon harnessed to your body you reduce the risk of it becoming separated from you.

While some avalanche beacons will come with a harness, others require you to purchase it separately. Before purchasing your beacon, check to see if a harness is included and if not, make sure you purchase one.

Probe

What it is: A probe is a lightweight, collapsible stick typically six to seven feet long once assembled.

avalanche safety
The ripcord action of the Black Diamond Quickdraw Probe makes for fast deployment when it counts. Click the image to view this probe on Amazon.

How it works: A probe is used for probing into the snow in order to locate someone buried beneath the surface. Your probe will provide you with a good idea of where to start digging should one of your crew members be buried by an avalanche. Look for quick-deployment designs that snap into place, ready for use immediately. Probes are also used to assess the current snow pack to determine avalanche risk.

Shovel

avalanche safety
Backcountry shovels are designed to be compact, lightweight, and ultra sturdy for quick set up and vigorous digging. Click the image to view the AAA Sport Utility Shovel on Amazon.

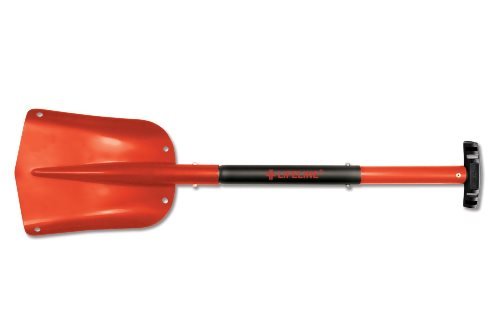
While fairly self-explanatory, a shovel is an essential tool to have on-hand for avalanche safety, especially for rescuing those caught in an avalanche. In order to perform an effective rescue, you will need to dig quickly, a task that is much more easily performed with a shovel. Look for a collapsible, high-volume shovel and remember – carrying a shovel with you will be more than worth it when you need it as your window of opportunity is so slim.

Helmet

avalanche safety

Head injury is a serious concern especially when it comes to outdoor sports. Surviving an avalanche is no different than surviving an extreme skiing accident. Wearing a helmet will help provide protection from head trauma in the event of impact – whether during a fall or in an avalanche. In fact, it is quite common for avalanche victims to die prior to burial due to sustained injuries, so any added level of protection is prudent. For more information, please review this resource from BackCountry.com.

Avalanche Airbags

Avalanche airbags have been gaining popularity among outdoor enthusiasts but have also met with some skepticism.

What it is: An avalanche airbag is a backpack-style flotation device that can be deployed should you become caught in an avalanche.

How it works: The principle behind the airbag is that it makes your body larger without increasing your mass, thereby decreasing your density and heightening your chances of staying closer to the surface. While an avalanche airbag by no means guarantees survival, it can help your efforts by protecting your head, neck, and shoulders from impact.

The aforementioned skepticism stems from a fear that avalanche airbags encourage reckless risk-taking by providing a false sense of security. For more information, check out this resource from OutdoorGearLab.com and see how they work in the video below:

When traveling with an avalanche safety airbag system, be sure to check with the airline regulations. The cylinder will need to be emptied and you may need paperwork with it. For more information on traveling with survival gear, CLICK HERE.

What You Need To Know About Avalanche Safety

avalanche safety
Signs are one way of warning visitors about avalanches. Image via Rexness on flickr.

Avalanche Rating System

Whenever you are heading out in mountainous or snowy territory, always pay attention to the local warning system. Typically, the system will consist of a rating between 1 and 5, where:

1 – Low chance of avalanche

2 – Moderate chance of avalanche

3 – Considerable chance of avalanche

4 – High chance of avalanche

5 – Extreme chance of avalanche

Geological Conditions for Avalanches

The layering of different types of snow can make an area more susceptible to avalanches. Powdery snow is an especially unstable base layer for heavier snow as the wet snow compacts into a slab that can easily slip off the sugary base on an incline.

Avalanches typically form on slopes between 30-45 degrees, however, avalanches can form on slopes of anywhere between 25-60 degrees. In terms of ground slope shape, a convex shape will have a higher tendency to avalanche than a concave shape.

avalanche safety
The pattern of snow collection results from sun and wind exposure.

Slopes that lack trees and thick brush will have no anchor points and are therefore more susceptible to avalanches. Additionally, the direction that the slope faces and the time of year also play a role in how likely an avalanche is to occur. In mid-winter, a north facing slope is the most dangerous while those that are south-facing become dangerous in the spring.

A slope that faces into the wind will not only accumulate less snow, but also experience compaction from the wind. Conversely, a slope sheltered from the wind will collect a large volume of drifts and be less compacted, creating prime conditions for an avalanche to form. As such, avoid trekking out on days with steady winds of 15 mph or more due to the dangerous drifts created.

Warning Signs an Avalanche is About to Occur

avalanche safety
Pay close attention to local warning signs and avoid restricted areas. Image via Cory Doctorow on flickr.

A key warning sign to look for in anticipation of an avalanche is a deep layer of newly fallen snow as it has not had a chance to compact. When assessing an area, look carefully at the trees and rocks as this is where compaction comes from. Inserting a probe into the layers of snow can help assess what is happening with the layering underneath.

Another avalanche safety indicator is the shape of the snowfall. A layer of small needle or pellet-shaped crystals can mean danger as this type of snow can suddenly give way, much like a house of cards. Conversely, large snowflakes compact more easily and are ‘sticky,’ although a heavy rate of snowfall (> one inch per hour) of any kind makes for bad conditions.

avalanche safetyA dry slab is another warning sign, this occurs when old snow layers break off as a unit and slide down the mountain in one big slab. The sheer mass of the slab causes it to pick up speed as well as additional snow, resulting in the entire side of the mountain coming down with it. Dry slabs cause the most deadly types of avalanches due to their large scale, size, volume, and the speed with which they occur.

Temperature is another avalanche gauge to be aware of. The lower the temperature, the less stable the snow will be. Temperature / sun exposure that allows for some melting and settling is safer than a shadowy area that remains below freezing. However, if the temperature is too high, such as in the spring, wet snow slides can form.

When reviewing an area for warning signs of an avalanche, look for the following:

  • Evidence that a particular path has avalanched before, indicating that area is prone to avalanches
  • Whether or not avalanches have occurred on nearby slopes
  • Current snow conditions are unsafe
  • Hollow-sounding snow
  • Cracks in the surface of the snow (an indication a dry slab is forming)

Avalanche Safety And Survival Tips

While avoiding an avalanche entirely is the best way to ensure survival, if you are out backcountry skiing, boarding, or climbing and an avalanche comes pouring down after you there are steps you can take during the initial commotion that will help increase your chances of getting out alive.

Steps to Take When an Avalanche Begins

avalanche safety

As soon as you notice signs of an avalanche, begin to move away from the center as quickly as possible. The center flows at peak velocity and volume, which makes it much more difficult to fight against. Your first goal should be to get yourself toward the closest side as quickly as possible. If you’re really lucky, you may be able to get completely out of the way and avoid being swept up in the avalanche.

Often times, the cause of an avalanche is activity and it will form right under your feet. If you react quickly and jump uphill, you may be able to get yourself to safety and avoid being swept away. If you’re unable to get out of the way fast enough, the next step is to prevent yourself from being buried. It may sound simple enough but when confronted with a massive force of snow and ice, it becomes extremely challenging.

avalanche-safety-8

As your body is more dense than the snow, you will naturally sink. Rescuers recommend using a swimming or thrashing motion uphill in the opposite direction of the flow to help keep you up near the surface. The closer you can stay to the surface, the less digging you will need to do once the snow settles, giving you a huge advantage in terms of avalanche survival.

If you can find a tree or a rock, this can provide an anchor point for you to hold onto and maintain your position in a less powerful avalanche. Delaying your descent for even a few seconds can improve your chances of not being buried as deeply, or even at all.

avalanche safety
Airbags, like this one by Backcountry Access, help increase your chances of staying “afloat” in an avalanche. Click the image to view details on Amazon.

Another prudent move is to hold your hand over your head as this will give you a better chance of being seen by rescuers as well as provide a sense of which direction to start digging after the snow settles.

In terms of lightening your load, there are mixed schools of thought. On the one hand, the lighter you can make your body, the easier it will be to stay afloat or pull yourself out of the snow; however, on the other hand, you never want to willingly separate yourself from your survival equipment.

Keep in mind that if you are encased in an avalanche, your immediate situation is that you are trapped in a cold environment and may have to wait a long time before anyone locates you. Getting rid of anything that will help keep you warm, nourished, provide first aid, and most importantly, help others locate you, would be a counterproductive move to your survival.

A key tip if you become trapped in an avalanche is that as the snow begins to slow down, fill your lungs with air and hold it in to give your chest room to expand after the snow settles. Snow is very heavy and its weight causes it to compact quickly. Without performing this maneuver, you may not be able to expand your chest to take in air after it settles.

cold weather survival gear

Steps To Take When Trapped In An Avalanche

Once you have stopped moving, time is of the essence. Your first priority should be to get to the surface as quickly as possible to avoid running out of air or becoming trapped. In the first 15 minutes you have the highest rate of survival (about 93%), but your chances decrease significantly after that.

If after the avalanche has settled, any part of your body is above the surface – and you’re sure of it – begin to dig in that direction. However, being tossed around and buried can be very disorienting and finding yourself in a situation where you’re not sure which way is up is not uncommon.

If you are unsure of which direction you should dig, gravity can be a good tester. Visible rising breath is a good indicator but there is a more reliable test – the spit test. Clear a space near your face and spit – the liquid will go straight down compliments of gravity, telling you to dig in the direct opposite direction to reach the surface.

Unlike drowning, when you are trapped in an avalanche, there is air trapped in the snow with you. To create a larger pocket for breathing, continually push the snow away from your face. Additionally, your body movement will compact the snow around you creating more air space.

avalanche safety
With this much snow, a probe and a shovel are essential avalanche safety equipment. Image credit Clayoquot.

If you are close enough to the surface, continue to to dig upwards, poking anything you can above the surface, such as a ski or brightly colored clothing, as this will make it easier for your rescue party to spot you. If you’re not close to the surface, it might be best to conserve your energy and focus on breathing.

Definitely make an attempt to call out for help but do keep in mind that when you are trapped beneath the surface, you may be able to hear others calling for you but they are unlikely to be able to hear you. If you can hear your rescue party but it’s obvious they can’t hear you, remain calm and give them a few minutes before calling out again. Otherwise, you may waste your air supply and voice by continually shouting to people who can’t hear you.

A rather unconventional but potentially life-saving tactic when buried in an avalanche is to urinate. For one thing, the pressure of being buried may be very uncomfortable on your bladder, but more importantly, the odor acts as a beacon for rescue dogs sniffing around the surface.

avalanche safety
Avalanche rescue dogs are trained to sniff out buried victims. The stronger your scent, the more likely they will be to find you. Image via Paul Morris on flickr.

The mere thought of being caught in an avalanche is terrifying and should you have the misfortune to ever be buried by one, no doubt your natural instinct will be to panic. Fight this urge. By remaining calm, you will slow your breathing and preserve the available air beneath the snow, which will afford you more time to get out. This is where preparedness presents a major advantage. If you know what to do it will be easier to remain calm and you can focus on the survival tasks at hand.

If you want to experience the terrors of surviving an avalanche without leaving the safety and comfort of your home, check out this video from the helmet cam of a backcountry skier who was buried in an avalanche. Luckily, he finds his way with a lot of help from his friends. Notice how they had to dig for him using their skis and hands – a shovel would have been very helpful!

Conclusion

When it comes to avalanche preparedness, awareness and knowledge are your best tools. Always be aware of the daily and regional conditions in your area, make sure you and your crew are packed with the proper equipment, and attend training courses to learn more about avalanche survival. Remember, when it comes to avalanche safety, avoidance offers your best chance for survival, always err on the side of caution when out enjoying the backcountry.

Your Thoughts

How do avalanches rank in your threat assessment? Are they something you are expecting and prepared for, or a rare occurrence you don’t expect to encounter? Have you ever been in an avalanche or used avalanche safety gear? What was your experience like? Tell us your thoughts and leave your questions in the Comments section below, thanks!

Read More

cold weather survival gear

Cold Weather Survival Gear & Tips For Battling The Snow

cold weather survival gear

Winter can be a beautiful and highly enjoyable season with lots of holiday celebrations and exciting sports; however, if you live in an area where snow is inevitable, winter presents some unique threats to your survival you need to be prepared for with appropriate cold weather survival gear.

The temperature drop itself can be a huge threat. In the cold, your body will need to work harder and require more calories and warmth to sustain itself. Additionally, basic survival activities such as harvesting water, gathering food, and lighting a fire become increasingly challenging when faced with snow-covered ground.

cold weather survival gear
Be prepared for winter survival scenarios that can leave you out in the cold.

However, the best reason to prepare yourself and your family with cold weather survival gear is that you need not only be prepared for bugging out, but also for the chance that a major blizzard could leave you stranded in your home without power, or worse, out in the elements. In this article, we will address the challenges and threats you could possibly face this winter and provide some key tips and recommendations on cold weather survival gear to help you be prepared.

Maintaining Core Body Temperature

For your body to function properly, it must maintain a temperature of 98.6℉. If your body deviates from this temperature, there are built-in mechanisms that kick in to help restore the core temperature and warm you up.

cold weather survival gear

Typical outward signs that your body is working harder to keep you warm include shivering, teeth chattering, and goosebumps. If your body goes through prolonged periods of exposure to cold temperatures, your heartbeat will decrease and blood pressure will slow, reducing the delivery of oxygen to your organs.

This will effectively cut off your extremities from heat sources as body warmth is focused on vital organs (at this point, your hands and feet will turn purple, becoming tingly and then numb; for more information, please click on this link). These changes can severely affect your ability to think and move, becoming life-threatening in the worst-case scenario.

cold weather survival gear
Hypothermia isn’t only a concern outdoors. Without electricity, your home can become dangerously cold.

The best way to protect yourself against the cold is to dress in layers. Three layers are best, beginning with a thermal layer, then an insulating layer, and finishing with a shell or outer layer.

What to Look For in Thermal Layers

cold weather survival gear

For the most effective thermal layer that will keep you warm and dry, look for the following fabrics:

  • Synthetic polyester blends. These fabrics will wick moisture away from the skin and are lightweight; they include rayon, nylon, polypropylene, and spandex. An added benefit is that they move well with you due to their stretchy nature and can fit tightly under other layers without restricting movement.
  • Merino wool. This fine-fibered wool will not cause itching as traditional wool does and evaporates moisture within the fabric to help keep you dry. It is naturally antibacterial, unlike synthetics, which makes a big difference when you will need to wear your thermal layers for an extended period of time.
  • Silk. Silk fabric can be treated to enhance wicking and is very soft, however it typically requires washing after each wear, making it an unfavorable choice for survival conditions.
  • Cotton. While cotton is a soft and comfortable fabric, it also retains moisture, which is not only uncomfortable but also works against keeping you warm as evaporating perspiration will actually cool your skin.

In terms of fit, look for a close-fitting thermal layer, as this lends itself well to adding on additional layers. Ensure that the arms and legs are long enough that they completely cover your wrists and ankles, and that the waist and shirt overlap in order to protect your back when squatting or bending.

Thermal Layers For Men And WomenKey Features
Carhartt Men's Base Force Performance Super Cold Weather Crew Neck Top
• Heavy knit Polyester-Spandex fights extreme cold
• Wicks moisture away from the skin and resists odors
• Crewneck and droptail back lock in body heat
Carhartt Men's Base Force Performance Super Cold Weather Bottom
• Heavy knit Polyester-Spandex fights extreme cold
• Wicks moisture away from the skin and resists odors
• Long, fitted rib-knit cuffs prevent riding up at the ankle
Rothco ECWCS Poly Crew Neck Top
• 100% Polyester with ultra-soft fleece lining
• Tiny air pockets trap heat close to the skin
• Same Extended Cold Weather Clothing System used by U.S. Armed Forces
Rothco Gen III Level II Underwear Bottoms
• Highly breathable Polyester-Spandex grid-fleece with moisture-wicking technology
• Microban fabric ideal for long-term use
• Level II of the Extended Cold Weather Clothing System used by U.S. Armed Forces
The First Outdoor Women's Thermal Underwear Set
• Polyester-Spandex fabric with suede lining for added comfort
• Fabric resists pilling in high friction areas
• Athletic seams on shirt and pants for ease of movement
Duofold Women's Heavy Weight Double Layer Thermal Shirt
• Double layer Polyester-Spandex blend designed for extreme cold
• 4-way stretch and princess seams provide a contoured fit that moves with you
• Anti-microbial fabric ideal for long wear
Duofold Women's Heavy Weight Double Layer Thermal Leggings
• Double layer Polyester-Spandex blend designed for extreme cold
• Flatlock seams prevent skin irritation
• Drawstring for an adjustable fit
Sportown®Women's Odor-resistant Merino Wool Base Layer Shirt
• 100% Merino wool is extra soft against the skin
• Moisture wicking technology keeps you dry
• Lightweight and designed for active use
Click on the images to view current pricing on Amazon.

What to Look For in Insulating Layers

Once you’ve established a solid thermal layer, your next layer should be made of insulating material such as wool, fleece, or down. Wool, and some types of fleece, will still insulate when wet, however down is best in dry conditions as it loses its insulative qualities when wet. In extreme conditions, there is always the option of adding additional insulating layers.

Insulative Layers For Men And WomenKey Features
Columbia Women's Fast Trek II Full-Zip Fleece Jacket
• 100% Polyester with four-way comfort stretch for mobility
• Full zip doubles as a jacket in warmer weather
• Zippered pockets on front and sleeve for keeping gear close at hand
The North Face Womens Glacier 1/4 Zip
• Polartec Micro fleece dries quickly to keep you warm
• 1/4 zip allows for ventilation during rigorous activity
• Lightweight and great for layering
Minus33 Merino Wool Women's Sequoia Midweight 1/4 Zip
• 100% Merino wool with interlock knit construction to trap heat
• Flatlock seams make for a low profile when layering
• 1/4 zip allows for ventilation
Columbia Men's Steens Mountain Front-Zip Fleece Jacket
• 100% Polyester filament fleece is soft yet rugged
• Standing collar provides extra neck protection
• Zippered pockets ideal for hand warmers
The North Face Mens TKA 100 Glacier 1/4 Zip
• Ultra-soft TKA 100 fleece insulates against the cold
• Reverse-coil 1/4 zipper reduces bulk around the collar
• Thin and comfortable for layering
Minus33 Merino Wool Men's Isolation Midweight 1/4 Zip
• 100% Merino wool with interlock knit construction to trap heat
• Flatlock seams make for a low profile when layering
• 1/4 zip allows for ventilation
Click on the image to view current pricing on Amazon.

What to Look For in a Shell or Outer Layer

The ideal outer layer for cold weather survival is breathable, allows for movement, and protects against the elements such as wind, rain and snow. Breathability is key in order to allow perspiration to evaporate, otherwise, it will condense on the inside of your shell and cause you to feel colder. Good options for lining that allow for air circulation while keeping you warm include Gortex and eVent.

For outer fabric, look for something treated with weather proofing, such as teflon, as this will keep out wind, rain and snow to keep you dry and retain body heat. Also opt for a hood in your cold weather survival gear to provide protection for your neck and head – some hoods even have a built-in brim to keep rain and snow off your face, helping to prevent frostbite.

cold weather survival gear
Protect as much skin as possible from exposure to the cold air.

While heavy, bulky winter coats are a great source of warmth, they do little to allow for sufficient movement to perform survival tasks. Look for an ‘athletic fit,’ which will typically be trimmer and stitched to accommodate arm movement.

Finally, don’t neglect your legs, they need protection too! When looking for a cold weather survival snow pant, the same favorable qualities you would look for in an outer shell apply: breathability, mobility, and wind/water proof. Additionally, look for plenty of pockets so you’re able to keep cold weather survival gear close at hand.

Outer Shell Layers For Men And WomenKey Features
Arc'teryx Men's Theta AR Jacket

Arc'teryx Women's Theta AR Jacket
• 100% Polyester is rugged and durable
• Reinforced to add support to high wear areas
• Gore-Tex shell is light and breathable with side vents to cool off during exertion
• High collar keeps heat in and protects the neck
• Hood is roomy enough for a helmet but cinches for normal wear, with brim to shed rain
• Athletic fit eliminates bulk and longer length provides extra coverage from wind and snow
Mountain Hardwear Kelvinator Hooded Jacket Men's

Mountain Hardwear Kelvinator Hooded Jacket Women's
• 20D Ripstop Nylon shell is water repellant and designed to handle tough outdoor use
• Filled with Q.Shield Down treated to maintain insulating performance even when wet
• Compresses easily for packing due to stitch-through quilting
• Dual draw cords at the hem lock out cold air and adjust easily on the move
• Side zip pockets for warming hands or stashing gear
The North Face Apex Elevation Jacket Men's

The North Face Apex Elevation Jacket Women's
• Durable ripstop Polyester treated to be water resistant and block out wind
• Tight weave is abrasion resistant on the exterior and brushed on the interior for comfort
• Insulated body, hood, and sleeves provide superior warmth in harsh conditions
• Four zippered pockets with interior headphone slit perfect for listening to an emergency weather radio
Arctix Men's Mountain Snowboard Shell Cargo Pants

Arctix Women's Mountain Snowboard Shell Cargo Pants
• Waterproof, breathable nylon construction with reinforced seams and abrasion resistance
• Zippered hip pockets and velcro cargo pockets for holding tools
• Articulated knee for improved mobility especially when squatting by the fire
• Boot gaiters have grippers to keep them tucked into boots
Click on the image to view current pricing on Amazon.

Using Hand Warmers For Maximum Effectiveness

For those who participate in winter sports, hand and foot warmers are most likely a very familiar item. In everyday use, they make activities such as skiing or sitting in a football stadium much easier on your body, and in survival use, they prevent frostbite and lack of circulation to extremities. In terms of value, they are relatively inexpensive and can provide hours of heat without adding unnecessary bulk or weight.

Hand warmers work by using the exothermic reaction of oxidizing iron and forming rust. When sealed, the lack of air (oxygen) prevents the process from starting. After opening the package, shake it vigorously to allow air to enter the breathable cloth and mix with the iron, this activates the reaction and starts the production of heat. Once activated, place your warmers in an enclosed space, such as gloves, boots or pockets, trapping the heat and allowing it to build up continuously.

cold weather survival gear
Your hands are one of your most important survival tools! Keep them warm and protected.
Hand And Foot Warmers
HotHands Hand Warmers 15 Pair Value Pack
Heat Factory Premium Hand Warmer, 40 Pairs
Zippo Refillable Handwarmer
HotHands Adhesive Toe Warmer 6 pair Value Pack
Grabber Foot Warmer
Little Hotties Adhesive Toe Warmers, 30 Pairs
Click on the image to view current pricing on Amazon.

The Benefits of Wearing Snowshoes

cold weather survival gear

If you’ve ever had to trek through deep snow, you know how laborious it can be, but an additional concern in a survival situation is that it increases the risk of frostbite to your feet. With snowshoes, not only can you keep your boots above the snow, but also you conserve energy as it takes less effort to walk.

This can become of the highest importance in a situation where you find yourself stranded and need to walk to a nearby town or make your daily commute on foot due to a snowstorm.

cold weather survival gear
Stash a pair of snow shoes in your car in case you get stuck and need to continue on foot.
Snowshoes For Men, Women, And YouthKey Features
Chinook Trekker Snowshoes
• Aluminum frame is curved for ergonomic comfort
• Dual ratchet bindings adjust for a perfect fit and quick-release heel strap makes removal easy even with cold hands
• Heavy-duty crampons provide grip on slopes or icy areas
• Includes carry bag with mesh panels for ventilation
Alps Performance Light Weight Snowshoes
• Frame is designed for maximum floatation in heavy snow
• Aluminum tubing with TPU-85 plastic engineered for heavy use in cold temperatures
• Heel and toe crampons prevent slipping
• Bindings are situated to eliminate pressure points
MSR Lightning Ascent Snowshoe
• Toothed frame with lateral crampons sustains 360 degree traction
• Ergo Televator heel lifts reduce calf fatigue when ascending and can be activated using a pole grip
• Modular tails (sold separately) can be added for deeper snow conditions
• PosiLock bindings contour to any boot for a secure fit every time
Click on the image to view current pricing on Amazon.

Cold Weather Survival Gear & Tools

There are two major obstacles you will come across in winter that will impede your survival activities: clearing snow and starting a fire.

Clearing Snow

cold weather survival gear

You can never truly understand the importance of having snow removal gear on-hand until you’ve been through a situation where you needed it and it wasn’t there. On a personal note, this author will never forget the time I landed at the airport at night only to discover an unexpected blizzard had completely covered my car in over a foot of snow.

It was early in the season for snow, so having not expected it, I was left without any scraper or brush and had to use my bare arms and hands to clear the snow from my car. Now, I travel with snow removal tools year-round!

For stocking your bug-out bag, a folding shovel works great. Not only is this a compact tool, it also has multiple uses including clearing a spot for a fire, digging a shelter, and collecting snow to melt for drinking, among many other essential tasks.

Starting a Fire in the Snow

cold weather survival gear

When it comes to fire starting implements, if you have one, you have none. Carrying multiple means of starting a fire and packing them separately is a measure of precaution that most preppers live by.

In terms of firestarting tools, lighter fluid is not ideal in extremely low temperatures and tools such as Ferro rods or flint will be much more reliable.

cold weather survival gear
In heavily packed snow, you can create a bed of bark for the fire to rest on.

For collecting firewood, start as early as possible, avoiding waiting until dusk if possible, as you will need a fair amount to keep the fire burning all night. Pine trees are good to scout for as they naturally shelter their undergrowth and there are typically plenty of dry dead branches beneath dense evergreen that can be collected for firewood with little effort.

cold weather survival gear
The denser the foliage, the more protected the base will be so look for evergreens that have thick lower branches.

However, obtaining larger dry logs can prove a bit more challenging, so it’s always prudent to carry a hatchet or tomahawk with you as these tools prove immensely helpful in cutting through thicker wood.

Even if the outside is damp, a fallen tree can provide enough fuel for one night if you can split the logs and cut away the damp portion to use the dry, inner part for firewood.

Once the fire is burning large and hot, you can add the occasional green log, which doesn’t produce as much heat as dead wood, but does burn much longer.

cold weather survival gear
Collect a pile of wood about six feet long by 3 feet high to ensure you have enough to last the night.

An excellent option for quickly and easily starting fires in windy, cold conditions is the Everstyke Survival Lighter. Click here to read more about this essential cold weather survival tool and how you can get your very own!

cold weather survival gear
The Everstryke Pro combines both a fuel-based system and flint and steel striker, so you can spark a fire under any conditions.

Harvest Water Safely in Cold Conditions

Yes, snow and ice are made of water, but there are still some unique obstacles to navigate through in obtaining life-saving, clean drinking water.

Harvesting Directly From Snow

Clean snow, such as fresh snow scooped directly off branches or brushes, is considered reasonably safe to consume. The part you’ll want to watch out for is that consuming snow (which is frozen) will result in lowering your core body temperature, making your hard work to preserve your body heat all for naught. If possible, boil the snow before drinking it and bring the water down to a consumable temperature by placing your drinking container in the snow.

Harvesting From Lakes, Rivers and Streams

The challenge with harvesting from an iced-over body of water is the danger that you may fall in and have hypothermia set in. Hypothermia is life-threatening and can be triggered by something as simple as submerging your feet in cold water, which can cause a significant drop in body temperature and increase your risk for frostbite.

When conducting survival activities around frozen or partially-frozen bodies of water, it’s always best to put safety first. One way to avoid coming too close to the edge is to carry cordage with you: throw a rock or log to make a hole in the ice within reach from shore, then tie your water bottle to a length of paracord (make sure it is secure so you don’t lose your water bottle!), then safely submerge the water bottle from solid ground and reel it in when it is full.

Before drinking, be sure to filter, boil, or treat your water as Giardia bacteria can survive in very cold temperatures, even ice!

cold weather survival gear
Keep a safe distance from icy rivers and always purify water – even ice contains harmful bacteria.

To be able to drink your harvested water safely without having to worry about bacteria or contamination, consider packing Lifestraws in your bug-out bag. These ingenious tools make it easy to turn harvested water into safe drinking water. Click here to learn more about Lifestraws and find out how to get your very own!

cold weather survival gear

Conclusion

Survival is challenging, but the additional threats posed by cold weather make survival activities extra challenging in winter, including maintaining your core body temperature, starting a fire, and harvesting water. However, with the proper knowledge and the right cold weather survival gear, you’ll be prepared to survive anything nature throws at you!

More Great Cold Weather Survival Gear


Your Thoughts

What is your most essential winter survival tool? What other winter survival gear do you pack? Tell us in the Comments section below, thanks!

Read More

The Ultimate Prepper Gift Guide

prepper gift guide

It’s hard to believe, but 2015 is almost over. Along with the end of another year comes the holiday season – a beautiful time of year where love and togetherness are celebrated, pretty lights cover the streets, and families get together for long overdue reunions.

However, the holidays can also be stressful, especially when trying to find the perfect gift for that picky prepper on your list.

Not to worry, The Bug Out Bag Guide has you covered! We’ve compiled our annual list of the top survival gear any prepper would be thrilled to receive. We’ve spent the year reviewing all things survival and have evaluated each item to narrow down our list to the top gifts that are perfect for any prepper on your list.

If you happen to be the picky prepper, consider sending this link out to friends and family as a helpful hint!

prepper gift guide
Leatherman Skeletool

Ultimate Prepper Gift Guide

prepper gift guide

The answer to the question, “What does the prepper in my life need?” really depends on the answer to the question, “What problem is he/she trying to solve?” When it comes to survival, there are a multitude of scenarios and tasks to consider, and having the right tool for each specific task is crucial.

In our Ultimate Prepper Gift Guide, we’ve evaluated all the essential prepper tools and determined which ones best fit the needs of preppers while minimizing weight and size, and maximizing functionality.

Always remember, when shopping for prepping gear, it is not always the most expensive item that will best suit your purposes, but there is no substitute for quality. Ensure you invest in high quality gear that is built to last – you’re investing in more than items, you’re investing in your ability to survive.

Gift IdeaGreat ForWhy It's GreatLearn More
Eagles Nest Outfitters JungleNest Sleep System
Backpacking
Camping
Bug out bag
Get home bag
This hammock set includes everything you need to sleep comfortably anywhere! DoubleNest Hammock, Guardian Bug Shield, Rain Tarp, Atlas Suspension Straps, Steel Carabiners, Aluminum Stakes, all tucked in a stuff sack for easy transport.Bug-Out Hammock:An Essential Addition To Any BOB
Mountainsmith Morrison 2 Person 3 Season Tent
Backpacking
Camping
Bug out bag
Get home bag
Weighing just 5 lbs, this 2 person tent is perfect for outdoor life. Bathtub floor and taped seams keep the rain out, while mesh panels allow for ventilation. The dual doors make it easy to get in or out without disturbing each other.How To Choose The Best Lightweight Tent For Camping, Recreation, and Bugging Out
Ambient Weather WR-111B Radio
Bugging in
Bug out bag
Get home bag
Traveling
Multiple power options make this emergency radio great for home or travel. It comes with mini, micro, and USB adaptors for charging cell phones and other devices. The LED flashlight provides an emergency light source, as well.Stay Connected: How To Choose An Emergency Weather Radio
Leatherman Skeletool CX
Every day carry
Bug out bag
Get home bag
A well-designed multitool strong enough for any job yet light enough for EDC. The blade is located on the outside for quick, one-handed access. Inculdes 4 universal driver bits, pliers, wire-cutter, and intergrated carabiner to clip to a belt loop or strap.Best Multitool For Backpacking & Survival
Wartech 8" Assisted Open Folding Tactical Survival Pocket Knife
Every day carry
Bug out bag
Get home bag
Camping
This survival knife is loaded with extra features, such as a glass breaker, seat belt cutter, and LED light. The blade opens with the touch of a lever and stays locked when in use. It is a sturdy pocket knife with many survival applications, making it a great tool for experienced and novice preppers.Survival Pocket Knives – Our Top 10
Gerber Impromptu Tactical Pen
Every day carry
Bug out bag
Get home bag
Travel
I get a lot of compliments on this pen. Its rugged yet inconspicuous design and Rite In The Rain cartridge lend well to daily use. Click operation means no cap to drop or lose. I have used the glass breaker tip on 1/2 in thick window glazing with no trouble.Finding The Best Tactical Pen For Your Kit
Salomon Men's Quest 4D GTX Backpacking Boot
Bugging out
Hiking
Backpacking
These boots provide ultimate support and protection. Lined with waterproof Gore-Tex, with a gusseted tongue for sealing out water and debris. Control flex design provides ankle support and relieves muscle strain, which is essential for long hikes.Gear Up: Top Rated Survival Boots For Men And Women
Salomon Women's Quest 4D GTX Hiking Boot
Bugging out
Hiking
Backpacking
Lightweight and flexible enough for trail running, with a cushioned gusseted tongue to alleviate lace pressure. The braking pattern on the outsole provides extraction traction when descending steep terrain.Gear Up: Top Rated Survival Boots For Men And Women
5.11 Tactical Women's TacLite Pro Pant
Bugging out
Hiking
Backpacking
When you're on the move, you need clothing that moves with you. These tactical pants fit the bill, with breathable ripstop fabric, action wasteband, and reinforced seams. Hip mounted D-ring provides quick access to keys or tools.Gear Up: How To Choose the Best Tactical Pants
5.11 Tactical #74273 Men's TacLite Pro Pant
Bugging out
Hiking
Backpacking
These pants are designed for comfort and performance. High stress areas feature extra layering and triple stitching for durability. Seven pocket configuration holds all your gear close at hand. Fabric is teflon treated to repel stains and spills.Gear Up: How To Choose the Best Tactical Pants
Military Issue Tri-Fold Shovel
Bug out bag
Backpacking
Camping
Bugging in
Use it around the campsite for burying waste, building shelter, and clearing the firepit. A shovel can also serve as a back-up self-defense weapon. Folds to fit into a slim carry case, with a total weight less than 3 lbs.How to Customize your Bug Out Bag Contents for a Wilderness Survival Kit
CRKT Kangee Tomahawk
Bug out bag
Backpacking
Camping
Bugging in
Our top pick for a survival tomahawk! Forward weighting adds force to each swing while its light weight makes it easy to carry. Highly durable and versatile as a tool or self-defense weapon. How To Choose The Best Survival Tomahawk For Your Bug Out Bag
Flint & Steel Striker Set #7
il_570xN.484823969_3piz_small
Bug out bag
Get home bag
Backpacking
Camping
A handmade fire making kit that includes a handforged striker, tinder box, piece of flint, jute twine, and a manual with step by step instructions for striking a fire.PrimitiveFireMaking Store
Catatonk Atlatl
Bug out bag
Hunting
A unique gift for sharpshooters! Engineered specifically for hunting, the hammer grip tranfers more power to the arrow while the moderate shaft flex improves control.Comparison of Ranged Survival Weapons
Click the images to view current price on Amazon.
prepper gift guide
Takes a licking and keeps on clicking… Gerber Impromptu Tactical Pen.

Fully Equipped Kits

Have a prepper to shop for but don’t know the first thing about prepping? Consider buying a fully-equipped kit. Your prepper will love it and you can rest assured that your gift has just the items he/she is looking for. Alternatively, if you’ve already embraced the benefits of prepping but have someone in your family who needs a little encouragement, start off their prepping journey with one of these fully-equipped kits. When it comes to gifts, it’s the thought that counts, and what could be more thoughtful than arming your loved ones for survival?

The Ultimate Urban Survival Kit

The Ultimate Urban Survival Kit TUUSK
Click to view TUUSK in our store.

TUUSK (The Ultimate Urban Survival Kit)  was custom designed in collaboration with Ready To Go Survival. Weighing only 16 pounds, it is packed with carefully selected, high quality gear to enable you to survive an urban disaster. Included in the kit are means of protection, self-defense, communication, first aid, fire starting, shelter, water purification, and more.

Wise Company Deluxe Survival Kit

This kit has many of the features of a basic kit, such as a first aid kit, hand powered flashlight, and an emergency shelter as well as some of the more advanced, “kitchen sink” options such as a multitool, water filtration bottle, and a stove and fuel. It also has 44 portions of food which will keep a survival party going for a long time. Click the image to view on Amazon.

Stocking Stuffers

prepper gift guide
What, you don’t hang your bug-out bags on the mantle?!

You’re never too old to hang a stocking for Santa! We’ve got a ton of great stocking stuffer ideas including some that are completely FREE (simply pay shipping)! For all those little gifts that will surprise and delight the prepper in your life, or to share the joy of prepping with those you love, stock up on our top stocking stuffers!

Gift IdeaWhy It's Great
LifeStraw Personal Water Filter
Never be without clean drinking water! Removes over 99.9% of bacteria and parasites without the use of harmful chemicals. Filters up to 1000 liters.
Black Diamond Positron Screwgate Carabiner
Carabiners have endless survival applications. They are great for clipping gear to a belt or pack for easy access, hanging a hammock, securing food out of reach of wildlife, as well as climbing and rappelling.
Nitecore EC11 LED Flashlight
Every prepper needs a dependable flashlight for their EDC and BOB. This one is waterproof IPx-8, with multiple beam size and intensity settings. Charger, case, clip, and bonus LightJunction keychain included.
Klean Kanteen Stainless Steel Bottle
Aside from the obvious benefit of a BPA-free way to transport water, single-walled stainless steel bottles can also be used to boil water or heat food in a survival situation.
Swiss Army Tinker Knife and Sharpener Set
A classic survival tool, featuring two blade sizes for handling a variety of tasks. Screwdrivers, bottle opener, tweezers, and more. Includes a keychain sharpener to keep the blades in top condition.
Click the image to view on Amazon.
prepper gift guide
The Everstryke Pro Waterproof Lighter from SurvivalLife is available FREE by clicking HERE.
prepper gift guide
Survival Life FireKable Paracord Bracelet is available FREE by clicking HERE.

Books and Media

Books and media make the perfect gift for both experienced preppers and those just starting out. Check out our list of the top prepping resources including our own Ultimate EDC Kit ebook, Run Prepper Run, and Aquaponics. Each of these fantastic resources provides a unique set of prepping knowledge to help readers prepare for survival as well as an entertaining read.

  • The Every Day Carry Guide ebook makes a great gift for preppers who want to build or enhance their EDC kit. It is packed with information on daily preparedness, assessing threats, and choosing the right gear for their needs.
  • Learn how to grow your own endless food supply! Easy DIY Aquaponics will teach you how to get started with aquaponics, how to maintain your system, and how to make crucial improvements and adjustments to accommodate your family’s changing needs.

prepper gift guide

Conclusion

Here at The Bug Out Bag Guide, we wish you and your family a very happy holiday season and hope that you stay warm, safe, and most importantly, prepared!

Your Thoughts

Do you have a perfect holiday prepper gift you didn’t see on our list? Tell us about it in the Comments section and we’ll be sure to check it out for our 2016 list!

Read More

best emergency weather radio

Stay Connected: How To Choose An Emergency Weather Radio

best emergency weather radio

Cellular technology and the Internet have completely transformed communications in the 21st century. Think for a moment: If suddenly your computer, TV, and cell phone stopped working, how would you communicate with others? Where would you go for information? The reality is, in the case of an emergency, most people would be completely cut off from the world, reliant on new technology that would cease to function in a disaster. Don’t be one of those people; in this article, we’re going to provide all the information you need to select the best emergency weather radio that will keep you in touch when all other communication mediums fail.

What Is An Emergency Weather Radio

best emergency weather radio
Not your father’s transistor radio: Technology has come a long way, making emergency weather radios portable and self-powered.

In the case of disaster, an emergency radio will allow you to receive signals modern technology can’t, and stay current on important information such as weather or updates on the disaster situation. NOAA Weather Radio broadcasts on frequencies not accessible to standard radios, such as the one that may be in your car, and is able to receive vital updates from the National Weather Service in the case of severe weather such as hurricanes, tornadoes, and flooding.

best emergency weather radio
Stay informed of events around you so you know when to bug-in and when to bug-out.

When there’s no power, most emergency weather radios have additional features to power the device via solar or hand crank. When all other technologies fail, if you have an emergency radio, you will have access to information about road closures, the direction of the storm, where emergency shelters are located, and whether or not armed forces have been dispatched. With this knowledge at hand, you can better plan your next course of action; whether that be to stay put, or head out in a vehicle or on foot.

best emergency weather radio
During a wildfire, air quality warnings and evacuation information is broadcast for your safety.

The best part is, unlike most survival gear, there’s no need to store your radio away until it’s needed – you can use it every day! It works just as well as a standard radio and can be used to monitor weather alerts, receive current news, or listen to your favorite music station.

Features To Look For In An Emergency Radio

While emergency weather radios do share many features with standard radios, there are certain functional requirements you will want to specifically look for in your emergency radio including tuning, sound quality and options, power source and battery life, durability, size and weight, and multipurpose options.

Tuning

AM/FM, weatherband, and shortwave capabilities will give you the most options as the sensitivity of a radio determines how many stations it receives and the quality of reception. NOAA uses Very High Frequency (VHF) waves, transmitted using narrowband FM; most emergency radios will have a feature (either a sound or light) that will alert you when severe weather or other emergency broadcasting is taking place. Specific Area Message Encoding (S.A.M.E.) is also used by NOAA and the Emergency Alert System (EAS).

An emergency radio with S.A.M.E. technology is capable of customizing alerts to your specific area; some even have the functionality to turn off the alert at the End Of Message (EOM) prompt, so that the alert doesn’t continue after the first transmission has played.

best emergency weather radio
Tune in to emergency broadcasts to follow events in your area and stay informed of health and safety guidelines.

In terms of digital vs. analog, digital tuning is much easier to accurately tune and program; however, an analog tuner presumably won’t be affected by an EMP event, whereas a digital system may become unusable.

Emergency Radio Fact: In testing your emergency weather radio, you may notice that more AM stations are received at night; there is a simple explanation for this. Daytime AM waves travel over the surface of the earth through a phenomenon referred to as groundwave propagation; generally, these waves reach no further than 100 miles. At night, reflection from the ionosphere, known as skywave propagation, increases the distance that AM waves can travel up to 100s of miles.

Sound Quality and Options

Things to look for: Maximum volume of audio, auxiliary input, headphone jack, mono or stereo.

When checking for sound quality, the maximum volume of the speakers will be measured in decibels (dB); often referring to as sound quality from a specified distance away, such as how loud the sound will be at one meter from the radio.

An equalizer setting is of little use for emergency purposes, but if you plan to use your radio on a daily basis for things such as news or music, you may want to look for a radio offering optimized settings for talk radio and various music genres, as well as indoor and outdoor use.

In terms of additional options, look for radios that offer headphone jacks and auxiliary input for playing audio from another device.

best emergency weather radio
You may want to listen to disaster reports through headphones in front of children so you can filter information that may be scary to them. This is also a helpful feature in noisy areas.

Power Source and Battery Life

Things to look for: Solar or hand crank capabilities, as well as plug-in feature for regular use; battery life.

Power versatility is a key feature in an emergency radio; look for radios with at least one alternative means for powering. The more options you have for powering your radio, the better your chances of staying connected; radios that run only on batteries require a backup supply and you may face the possibility of running out.

Hand Crank

The hand crank is a simple, yet effective, form of power. Hank crank radios convert mechanical energy into electric energy, which is then stored in a rechargeable lithium ion battery. The efficiency of these systems varies greatly, but typically two minutes of cranking will provide five minutes of radio use at full volume; while that may seem like a lot of work for limited use, it is very dependable and always available.

best emergency weather radio
Power up with a hand-crank anytime, anywhere so you don’t miss important alerts. Image via Alan Levine on flickr.

Solar Cell

Another common source of energy is a solar cell. You will find that some radios can run directly off solar power while others need to charge the battery, then run off stored energy. This method is of course limited to daytime use and may take up to six hours to fully charge a battery.

AC Adaptor or USB

If your radio comes with a rechargeable battery, you should also have an AC adaptor or USB that will charge directly when power is available, such as at home. Similar to solar powered radios, some can run directly off a connection while others need to charge first and then run.

best emergency weather radio
This radio stores the AC cord right on the back so it’s always ready when you need it. Click to view on Amazon.

In addition to your radio, you can also charge other electronic devices via mini, micro, and USB ports. Whether or not you can fully charge a smartphone depends on the battery capacity and discharge rate, but for emergency communications, this can be very helpful.

best emergency weather radio
Power up your cell phone to touch base with family or make emergency calls.

Battery Life

Whichever option you choose to power your radio, it’s extremely helpful to ensure there is some type of battery life indicator; this way, you will know when your battery is running low and can adjust your usage or seek out another power source.

Durability

Things to look for: Water and drop resistance, general construction, antenna, and buttons.

We were very surprised that only a few of the emergency radios we reviewed listed water and dust resistance ratings. Ideally, any device designed for outdoor usage should be splash resistant, but to be safe, we recommend tucking your radio in a plastic freezer bag to keep it protected when not in use.

best emergency weather radio
You never know what conditions may arise so the sturdier the radio, the better for bugging out.

To ensure your radio functions when you need it to, choose one with a fold-away hand crank and antenna; this way, those items are less likely to be damaged when packed in a bug-out bag. Additionally, a rubberized finish provides better grip – as does a lanyard or handle – and some models even have protective roll cages to withstand a fall on the ground. If you’ll be heading for the hills in an emergency, these are the must-have features.

Size and Weight

Things to look for: Ease of transport.

When prepping your bug-out bag, size and weight are of utmost importance. Many emergency radios weigh less than one pound and some are even small enough to fit in a pocket. If you plan to bug-in, or store your radio at your bug-out location, you may want to prioritize other features over portability.

Multipurpose Options

Added features are always a plus as they can help reduce the weight of your bag by combining several different items into one. Emergency radios can come equipped with a plethora of useful, additional features, including flashlights, compasses, strobes, sirens, and whistles. For more multipurpose tool ideas for your bug-out bag, CLICK HERE.

Key features to look for include the following:

  • Flashlight: Having a backup flashlight you can power indefinitely will ensure you won’t be left in the dark
  • Clock and calendar: Useful for keeping track of time when far removed from civilization or on a long-term bug-out
  • Temperature and humidity readings: This will allow you to monitor weather conditions
  • Cables: Always check to see which cables are included; simply because your radio has certain ports doesn’t guarantee it comes with the accompanying cables, many times these are sold separately
best emergency weather radio
In addition to the USB port for charging other devices, the Eton Scorpion II has an integrated caribiner for clipping to a bag or belt. Click the image to view on Amazon.

Top 10 Emergency Weather Radios

The following table showcases our picks for the 10 top emergency weather radios as well as key features, weight, and price range. To view the item and its current price on Amazon, click the accompanying image.

Emergency RadioKey FeaturesWeightPrice
Eton NSP101WXGR Scorpion ll
• Multiple power options to keep it running
• LED flashlight for an extra light source
• Rugged construction withstands outdoor use
14 oz$$
Ambient Weather WR-111B
• Solar panel extends battery life
• Illuminated digital display is easy to read
• Ultra lightweight for packing in a BOB or GHB
5 oz$$$
MIDLAND WR300 Weather Radio
• Alarm clock style is ideal for bug-in use
• S.A.M.E. technology for receiving local reports
• Preset up to 30 counties in the memory system for quick access
2 lbs$$
Eton American Red Cross FR1
• Compact design with flat folding crank and antenna
• NOAA alerts for weather preparedness
• Smartphone charger works quickly to power devices
1 lb$$
Sony ICF-S10MK2 Pocket AM/FM Radio
• Simple analog AM/FM radio fits in a shirt pocket
• Excellent signal sensitivity for picking up stations
• Runs on 2 AA batteries
10 oz$
Ambient Weather WR-335 ADVENTURER 2
• Uses rechargeable lithium ion battery or 3 AAA batteries
• Audio input plays music from iPods and phones
• 125 decibel siren for emergency signaling
1 lb$$
iRonsnow IS-088 Dynamo Weather Radio
• Rubberized coating for enhanced grip
• Efficient hand crank - 1 min yields 20 min of radio play
• Lightweight and compact for backpacking and BOB
7 oz$
Eton FRX5 Hand Crank Emergency Weather Radio
• Solar panel fully charges battery in 5 hours
• Rated IPx4 for protection against splashes
• Illuminated buttons for use in the dark
1.4 lbs$$$
Kaito KA600 NOAA Weather Radio
• Solar panel is adjustable to achieve optimal exposure
• Input stations 4 ways - manual, direct digital input, ATS, and memory tuning
• Temperature and humidity display, plus calendar and alarm clock for daily use
20 oz$$$
Ivation AM/FM/NOAA Radio
• AM/FM/NOAA radio with Bluetooth for wirelessly connecting to devices
• Display shows station, date, time, and temperature
• Rugged and water resistant design goes anywhere with you
3.5 lbs$$$
Click the images to view current pricing on Amazon.

Our Picks For Best Emergency Radios

Best Emergency Radio For Bugging-In

Our top pick: MIDLAND WR300 Weather Radio

This particular emergency weather radio has more of a countertop design and is less suited for travel. It receives NOAA and Environment Canada alerts using S.A.M.E. technology as well as an audio alarm to warn of extreme weather in your area. It can be programmed to receive alerts from up to 23 counties, which can be especially helpful in areas prone to hurricanes, floods, wildfires, or tornadoes.

For those that are hearing-impaired, it has a lighted display that features a text warning message along with the county the alert was issued in; it also displays “EXP” when a particular alert has expired. You have the option to silence test alerts and weather watches while still being cognizant that one has been received through an indicator light; should a watch turn into a warning, your alert will sound.

One drawback for this particular radio is that it does not recognize EOMs and automatically returns to standby five minutes after the EOM prompt; however, you have the option to manually mute the alert at the end of the message. Another issue is that the headphone jack is mono and not stereo, meaning sound will only come out of one earbud; however, you can correct this with a adaptor to make it double monaural, which will produce sound from both headphones.

In addition to emergency broadcasts, it functions fully as a clock radio with alarm and is therefore a good bedside radio for everyday use. An AC adaptor is included and four AA batteries can be used as backup should the power go out.

Best Emergency Radio For Battery Life

Our top pick: Eton FRX5

The Eton FRX5 is an all-around great emergency weather radio, but its standout feature is the efficient power system. Its hand-crank will provide thirteen minutes of listening after only two minutes of cranking – more than double the average for crank radios. When plugged in using the AC adaptor, a full charge is achieved through the lithium battery within five to six hours.

At maximum volume (an impressive 90 dB at one meter), the radio will play continuously for over fifteen hours. It uses AAA alkaline batteries and also has a high-efficiency solar panel that will keep the battery topped up when in use or fully charged after five hours of direct sun. This outperforms the solar panel systems previously discussed, making the Eton our pick for best battery life.

Additionally, this radio charges devices quickly over an extra fast USB output of 5V 2.1A and receives AM, FM, and NOAA; it also has S.A.M.E. technology and works well even in remote areas. You can program up to 25 locations from which to receive local reports and alerts.

Bonus features: Splashproof with IPX4 rating, headphone jack, auxiliary in jack, glow in the dark locator, LED flashlight and red emergency beacon, and alarm clock.

Best Emergency Radio For GHB/BOB

Our top pick: Ambient Weather WR-111B

Weighing less than half a pound, the WR-111B is perfect for use in your get-home or bug-out bag. It comes equipped with NOAA alerts and a digital AM/FM tuner, making the WR-111B a powerful receiver in a compact design. It is extremely portable and has a rubberized finish as well as lanyard for ease of carrying.

The battery can be charged via USB, AC, hand crank, or solar panel, and a low-battery indicator lights up when battery power falls below three volts. One drawback is that it does not use S.A.M.E. technology for receiving customized alerts.

The sturdy hand crank can be used for recharging while the radio is playing and conveniently folds away when not in use. An AC adaptor is available to purchase separately for plugging into an outlet; a “hard charge” via USB or AC adaptor is recommended every few weeks to maintain battery life.

best emergency weather radio
The WR-111B emergency weather radio also has an LED flashlight. Click the image to view on Amazon.


While the hand crank and solar panel can be used to charge the radio in an emergency, keep in mind that the solar panel serves to extend the battery life but does not provide a full charge; ensure you read the instructions carefully regarding care of the battery for optimal performance.

The battery is also removeable and replaceable, which is a useful feature if you intend on regular usage. This radio also includes cables and adaptors to charge different types of cell phones (mini, micro, and USB) as well as a headphone jack.

Best Emergency Radio For Selection Of Features

Our top pick: Kaito Voyager Pro KA600

When it comes to extra features, the Kaito Voyager Pro is fully loaded. The illuminated digital displays show mode, station, and battery life, as well as temperature and humidity. It features digital tuning that is adjustable via manual knob or buttons, including a number pad for direct entry of stations and programmable preset memory. The calendar, clock, and alarm are useful additions for everyday use as well as in a grid-down scenario.

With a turn of the dial, power input switches from the AC adaptor, solar charger, and AA batteries. The solar panel pivots 180 degrees and is larger than most emergency radio solar panels; in full sun, it is powerful enough to run the radio directly. The included rechargeable battery fully charges in under two hours via USB or AC, while you also have the option of using the hand-crank.

It receives high quality reception in FM, AM, and all 7 NOAA weather channels, even in remote areas – although the maximum volume is a bit low at 76.7 dB at a one meter distance. However, if background noise drowns out the sound, there are two headphone jacks. The antenna retracts neatly onto the back when not in use.

Another feature to note are the flashlights: It has a 5-LED reading light below the solar panel for mapping and small tasks, plus a 3-LED flashlight above the hand crank.

For portability, it is compact in size but a bit on the heavy side, weighing in at 20 oz; also, it is not rated for water or dust resistance.

Choosing The Best Emergency Radio For YOU

When choosing the best emergency radio for your needs, you need to consider transportation requirements, ease of use, and your particular priorities.

Transportation Requirements

Before choosing a radio, determine whether or not you will be transporting it, i.e. bugging out or using it in a get-home scenario, or staying put for bugging-in.

For bugging-out and get-home scenarios, weight matters and extra multipurpose features will help to offset any added weight by providing key items such as a backup flashlight or survival whistle. Additionally, having a means to charge batteries for other devices will come in quite handy.

best emergency weather radio
If you’re traveling through the wilderness, choose an emergency weather radio that is lightweight and has self-powered options.

When bugging-in, you need not be as concerned with size and weight, but local reporting features, such as S.A.M.E., will be very useful. While you may not need extra multipurpose features, a self-powered radio is always a boon, especially during power outages.

get home bag list


Ease Of Use

If you can’t use your radio, no amount of features or alternative power sources will be of use; make sure you practice using your radio so you are familiar with all of its features and can tune in to required information channels and sources.

If there are any preset functions, make sure to tune them into your local stations so everything is ready to go. Additionally, if you live in a remote area or plan on bugging-out to one, ensure your radio has the capacity to receive signals in your area.

best emergency weather radio
Test your radio in remote areas to make sure you can receive signals from your local stations.

Know Your Priorities

To make sure you get the best value for your money, think carefully about your needs before purchasing and choose a radio that addresses all your must-have features.

Conclusion

When cut off from everyday technologies we depend on, such as cellular and the Internet, staying informed and receiving the information you need to optimize your survival plan becomes a real challenge. Don’t be caught off-guard; safeguard your survival by staying informed during an emergency, no matter what. Choose an emergency weather radio that best serves your purposes and will provide the most value in a disaster. Most important, use your radio regularly so that you become familiar with its various functionality and are fully prepared to stay connected when disaster strikes.

Your Thoughts

Have you ever used an emergency weather radio before? Have you used one in an emergency? What was your experience like? Share your thoughts and questions with us in the Comments section, thanks!

Read More

Drones: A Prepper’s Guide

Drones-For-Preppers-Intro

Inspiration for new preps can come from unexpected places sometimes.  This happened to me when I was last visiting my parents and had the opportunity to take my Dear Old Dad’s quadrocopter drone for a test flight.

The drone, a Phantom 2 by DJI was a blast to fly around.  It also sported an HD camera that took high quality footage of us and the surrounding area.  It was surprisingly easy to control, even for a novice (me).  Watching the drone soar got me thinking, are there any applications to prepping that a drone could be used for?

How Would A Prepper Use A Drone?

I gave it some thought and came up with a few specific situations where having a drone on your side would be handy.  Most of these center around bug in scenarios as no one is going to want to haul around a power source or copter when bugging out.  In particular, using your drone to patrol or inspect your perimeter or the surrounding area would be a huge advantage to have.

Note: This is not intended to be an exhaustive overview of drone technology or all of the models that are available.  But, if you are planning on bugging in, it may be worth giving a drone some thought.

Me taking Dear Old Dad's drone for a spin.
Me taking Dear Old Dad’s drone for a spin.

Defending Your Perimeter

Your first line of defense in protecting your premises will be to build a perimeter security system that will alert you to the presence of trespassers and help you to prepare for any conflict – providing you with the upper hand defending your home.

In addition to this, having a drone on hand to inspect damage or investigate a disturbance would be a major advantage. While the use of drone technology for surveillance dates back to WWI, only recently has it become accessible for private use. With fitted cameras, sensors, and state-of-the-art flight capabilities, drones are showing that their usefulness extends well beyond simply serving as a hobby for aerial enthusiasts and photographers.

What Is a Drone?

Any unmanned aerial vehicle (UAV) or remotely piloted aircraft (RPA) is considered a drone. The majority of commercial drones are multirotors, with the most popular being quadrocopters (4 rotors). Most modern drones can be fitted with a camera to provide the operator with a bird’s eye view of the flight path, and some modern commercial drones come equipped with cameras already.

Drones are not merely military devices that function as insanely fun toys for the masses. They also have practical commercial applications including monitoring livestock, pipeline security, road patrol, search and rescue, wildfire mapping, videography and anti-piracy. As drones have the ability to pursue a manually-operated or automated flight pattern, they make ideal tools for homeowners to safely surveil their property without putting themselves in harm’s way.

Additionally, drones can be fitted with a variety of supplementary features including speakers, tasers, mace, and infrared or night vision cameras. For some models, flight paths can be monitored through smartphone and tablet apps.

Benefits of Perimeter Security

Effective perimeter security allows you to monitor what’s happening around your property from the comfort of your home or shelter and provides you with advance warning of any trespassers, giving you the upper hand.

Depending on the cause and length of your bug in situation, your property may become a target for other survivors, desperate to take your supplies by any means possible. When determining your security needs, consider your location in respect to its proximity to civilization and roadways, as the more accessible you are to others, the more of a target you become.

Other factors to consider when planning your perimeter security include the following:

  • Is there limited visibility caused by terrain or structures
  • Do you have an expansive property that can be easily approached from many directions
  • Are you located near a major roadway where travelers might have to abandon vehicles and continue on foot
  • If you are bugging-in in a suburban setting, are your neighbors close by
  • If you are bugging-in in an urban setting, how is your visibility of the area surrounding your building
drone-prepping-3
Would be pretty sweet for perimeter defense…

Why Use a Drone For Perimeter Security?

In terms of perimeter security, drones provide several advantages over mounted cameras or simply patrolling the property yourself, including mobile video surveillance, remote control and stealth.

Mobile Video Surveillance

Unlike a mounted camera, which is fixed on a designated area, drones are mobile and provide an unlimited field of view. The real-time video surveillance capabilities of a drone provide the ability to immediately assess whether a disturbance is a threat or welcome members of your team.

Remote Control

The ability to operate and control the drone from a distance not only keeps the operator out of harm’s way, but also facilitates the surveillance of large areas in a short amount of time and of areas that would be treacherous to travel by foot.

Stealth

Drones are generally very quiet and have long range view capabilities. Additionally, drones cannot be avoided or tampered with as can a mounted camera.

One drawback to drones is that, yes, they can be shot down by an intruder. But most people would much rather lose their drone than their own life.

What Type Of Drone Would A Prepper Buy?

You can find drones that sell for as little as $50, but if you want a durable, top-rated model, you’ll need to spend at least $1,000 or more. Drones can be purchased ready to fly or in kits that you assemble. If you plan on adding several of your own features, a do-it-yourself drone is probably the best option; in fact, several brands offer a modular design that adapts well to add-ons.

When purchasing your drone, consider the following:

  • Maneuverability
  • Durability
  • Ability to live stream (first person view) vs. recording you can watch later – this decision comes down to personal preference and circumstances

Look for drones with the following features:

  • Gimbal to stabilize video
  • HD cameras
  • Long stream broadcast distance (more than 100 yards)

Here is a video taken by drone to give you an idea of the scope and range of what an operator can see when in flight: 

What Features Should I Look For In a Perimeter Defense Drone?

There are a variety of different features that can be added to drones, the best ones for you depend entirely on your situation and particular circumstances. For instance, drones come with varying levels of user control, with the most extreme being completely autonomous drones that patrol without any human interference.

Depending on your needs, an autonomous device may be ideal or you may want some level of manual operation to check on specific disturbances.

When choosing a drone for perimeter defense, here are some useful features you should consider:

  • Detection software, which can be installed to recognize perimeter breaches and immediately send the drone to the vicinity of the breach. Additionally, this software can be synched with an invisible infrared geo-fence, motion detectors, or seismic sensors, that can all be positioned in key locations around your property.
  • Flight time charge, this is a crucial factor as you want to ensure the desired flight path can be accomplished with a single charge.
  • Safety features, including proximity sensors that will detect and avoid objects in the flight path, emergency landing gear in the event of mechanical failure, and a ‘return-to-base’ function in the event the battery is low or the connection with the controller is lost.
  • Video, this can be displayed on the controller, streamed to a smartphone or tablet, or connected via video goggles for a first-hand, virtual reality experience. If you won’t be actively monitoring the flight path, you can also have the data sent to a DVR for viewing at another time.
If you see one of these above you it is probably too late...
If you see one of these above you it is probably too late…

OK, So Which One Should I Choose?

The ‘best’ drone for you depends entirely on your particular needs; what is an optimal choice for one person may not necessarily serve the needs of someone else. The following are our top drones picks along with the relative benefits of each, review each keeping in mind your particular circumstances to determine which would be the best fit:

DroneFeaturesCost
DJI Phantom 2 Vision+

• Ready to fly and easy to operate out of box
• Flight time of 15-20 minutes
• Three-axis camera stabilization
• Shoots full HD video
• Controller is smartphone compatible for viewing video and adjusting camera settings
$$$
Parrot Bebop

• Flight time is approximately 10 minutes
• Can be controlled with an iphone or android device; alternatively, a SkyController can be purchased for $400 providing joystick controls, extended range, and HDMI output
• 14 megapixel camera with 180 field of view fisheye lens that automatically stabilizes the image, removes the fisheye effect, and sends image straight to a smartphone
• Records up to 8GB of 1080p video directly on the device
$$
3D Robotics X8+

• Offers 15 minutes of flight time
• 8 motors with 11” propellers
• Can lift 2 lbs. and has a sturdy design
• Modular platform allows for customizing; does not come with camera or gimbal, but these can be added
• “Follow me” gps tracking feature links to your smartphone
$$$
Hubsan Spyhawk FPV

• Spy plane design
• Front-facing camera • Built in LCD display on the controller
• Three-axis flight stabilization
$
Drone in Action - Chaotic Unmanned Personal Intercept Drone (CUPID)
CUPID
• Not yet available on market
• Sends live video feed to a smartphone
• Can locate an intruder and incapacitate them with 80,000 volts of electricity (see video!)
$$$$
ArizonaFPV The Copper Copter
ARIZONA-FPV-COPPER-COPTER
• Offers 10 minutes of flight time between charges
• Programmable
Camera included
Only available from the manufacturer
$$$$

What Else Should I Consider Before Investing in a Drone?

Remember that in a bug-in situation, power will be a scarce resource. As drones are battery powered, battery life should be a top consideration as well as having an alternative power source at your bug-in location. For instance, in the case of power grid failure, drone surveillance would be rendered useless without some other means of providing power.

power grid failure
What To Expect During A Power Grid Failure

Another consideration to keep in mind is government regulations regarding drone usage. As drones are an emerging technology, the FAA is drafting regulations concerning their usage. The most recent information states that a UAV (drone) must:

  1. Weigh less than 55 lbs.
  2. Always remain within the visual line sight of the operator
  3. Have a maximum speed of 100 mph (87 knots)
  4. Not be operated within 5 miles of any airport

In some situations, you may also need a license to operate one. While these regulations will be of little concern in a SHTF situation, be aware of them now to ensure you stay in compliance while practicing with your UAV.

Conclusion

Drones can be an excellent choice for perimeter security but involve a significant financial investment and require a decent amount of electrical and aerodynamical knowledge to maintain. Drones are also highly dependent on having a readily available electrical power source, an option that may not always present itself in every bug-in scenario. If you are considering using a drone for perimeter security, it is also important to keep an eye on the development of FAA regulations, which are only in the early stages.

The technology to remotely surveil your property and protect your family and supplies from intruders is here now, and it will only continue to improve. If you have a large property and are planning to bug in, a drone may be a smart investment. Always remember, when it comes to survival, chance favors the well-prepared.

Your Thoughts?

Have you ever owned or operated a drone? Would you consider using a drone for perimeter defense? Share your thoughts with us in the Comments Section below, thanks!

Read More